Category Archives: Tutorials

How to: Audrey Hepburn Makeup Look

10785129_372179452959657_289480348_n

10735050_1531330480444217_1711246037_n

When creating this Audrey Hepburn inspired makeup look I went for super bold brows, doe-eyed makeup, and red lips.

Main parts of her look:

  • Brows: I couldn’t get my brows exactly the same shape as hers since mine are so highly arched.  Her brows were super thick but very straight, with almost no arch.
  • Eye makeup: I tried to keep my eyes very wide-eyed by skipping out on black liner along my waterline.  The key to making my eyes appear larger like hers was using a nude pencil on my waterline.  Also, the winged liner and lashes helped to achieve her flirty looking eyes.
  • Lips: In many of the pictures I came across of Audrey, she had full-looking red lips.  I could tell hers were slightly overdrawn but I decided I would line my lips normally.

Below is the complete Audrey Hepburn inspired makeup tutorial.

Halloween Makeup Idea: Sugar Skull

Can’t think of anything to wear this Halloween?  Don’t have a costume? Then think about doing a sugar skull makeup look.  It’s easier than it looks and there’s no wrong way to do it.  Be as creative as you want!

10407552_843464485676817_447559322494470881_n  10151881_843464519010147_3201397024330261076_n  10603588_843464505676815_1998145326804459741_n

I used Violet Voss glitter in Parker and Piper, Anastasia Beverly Hills Waterproof Crème Color in Jet, ABH Tamanna Palette, Maybelline Color Tattoo in Fuchsia Fever, Iris by Myth Cosmetics, and NYX Jumbo Pencil in Milk.

Lenses: Eye Candy’s lenses in Neo Lucky Clover Green.

Flower halo: Mad for Halos.

Lashes: # 080 from Elegant Lashes.

Lipstick: Twilight from @justlovemonae on Instagram.

Brushes used: Luxie Beauty. **Use the code Cassie for 15% off your Luxie Beauty purchase.

Steps to achieve this look:

  1. I first applied a layer of BB cream all over my face.  I used one from Tarte.
  2. Next, I sketched out the eye sockets with Anastasia Beverly Hills Crème Color in Jet and started to shade them in.
  3. After that, I applied Maybelline Color Tatttoo in Fuchsia Fever all over my eye area and blended it into the black.
  4. Next, I applied Iris over the color tattoo and blended Noir from the Tamanna Palette around the outer part of the eye sockets.
  5. Then, I lined my upper lash line with the Crème Color in Jet and lined my lower lash line with Noir.  I also blended Noir into the crease of my eye.
  6. I then applied my lashes and applied Tarte’s Lights, Camera, Lashes Mascara to my lower lashes.
  7. Next, I sketched out my nasal cavity with the Crème Color in Jet and filled it in.
  8. After that, I applied NYX Jumbo Pencil in Milk to my face using a buffing brush and a small precise eye shadow brush for smaller areas like around my nose and between my eyebrows.
  9. Then I drew flower petals around my right eye and applied glitter to the center of each petal.
  10. After, I drew lines along my cheeks extending from the corners of my mouth to my ears blending Noir underneath the line and then adding a touch of Iris as well.
  11. Next, I shaded the center of my lips with the Crème Color in Jet and applied Twilight lipstick to the remaining part of my lips
  12. Then, I drew stitches with the Crème Color in Jet.
  13. Finally, I set the white parts of my face with a white highlighting powder–you can use translucent if that’s all you have.


http://instagram.com/p/utNfzNSndH/?modal=true

Tutorial: Creating an Ombre Lip

Ombre lips are very trendy especially for Fall.  I often get questions about how to achieve this look and it’s honestly not that complicated.  Below I’ve inserted a pictorial and listed the steps.

photo (1)

  1. First, you should exfoliate your lips to remove any dead skin.  You can either use a lip scrub or a soft-bristled tooth brush.  This will also make your lips appear more plump because, as stated in an online article, you will increase the blood circulation to your lips.
  2. Next, you’re going to want to outline your bottom lip with your lipstick.  You may even want to use a lip liner if you’re using a dark colored lipstick just because that can help prevent the lipstick from feathering and bleeding outside your lip line.
  3. After that, go ahead and outline your upper lip with your lipstick.
  4. Next, use either a lip brush or your finger to blend the lipstick into the center of your lips.
  5. Finally, apply a lighter colored lipstick to the center of your lips to create contrast.

This dark, vampy lip combo is absolutely perfect for Fall and Winter.  Pair these lips with a simple neutral cat eye and you’ll be good to go.

This ombre technique is useful in making your lips appear fuller.

Remember, there are no rules when it comes to makeup so get creative with your ombre lips! You can apply a lighter color around the outside of your lips and a darker shade in the center.  You can even start with either a lighter shade or darker shade on one corner of your mouth and have it fade to dark or light.

Here are a few other ombre lip looks I’ve done in the past:

Red Velvie and Plumberry Pie lipsticks from Beauty Bakerie
photo 3 (1)
Honey and Marshmallow lipsticks from Beauty Bakerie
photo 2 (1)
Divine Dime Cosmetics lipstick in Bell, Feyoshe Cosmetics lipstick in Nude Beach, and Tarte Cosmetics LipSurgence in Thoughtful


How to: Smokey Look Using the New Anastasia Beverly Hills Maya Mia Palette and Tamanna Palette

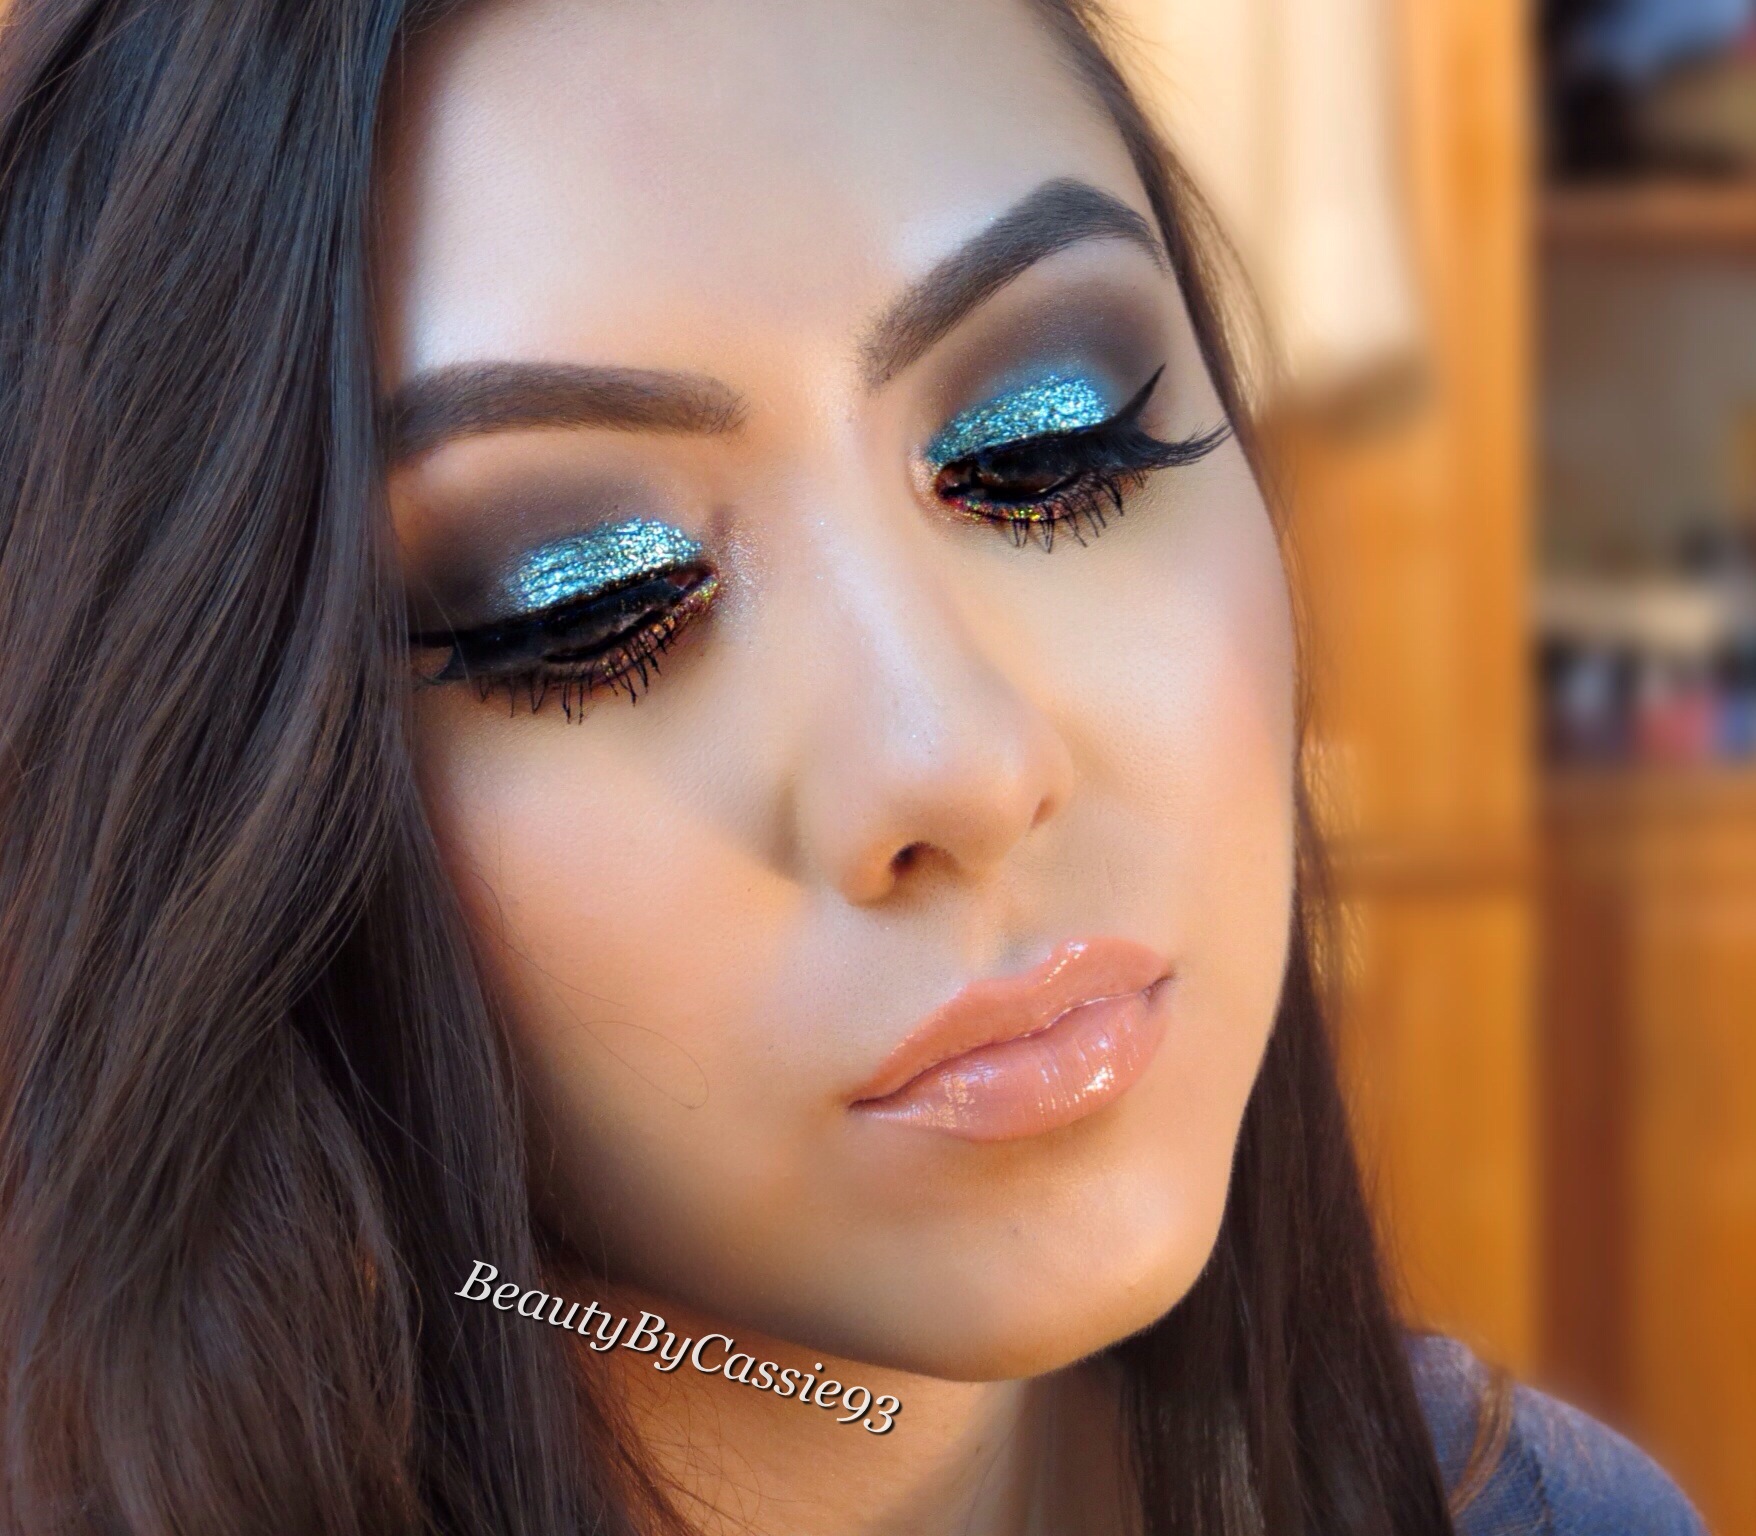
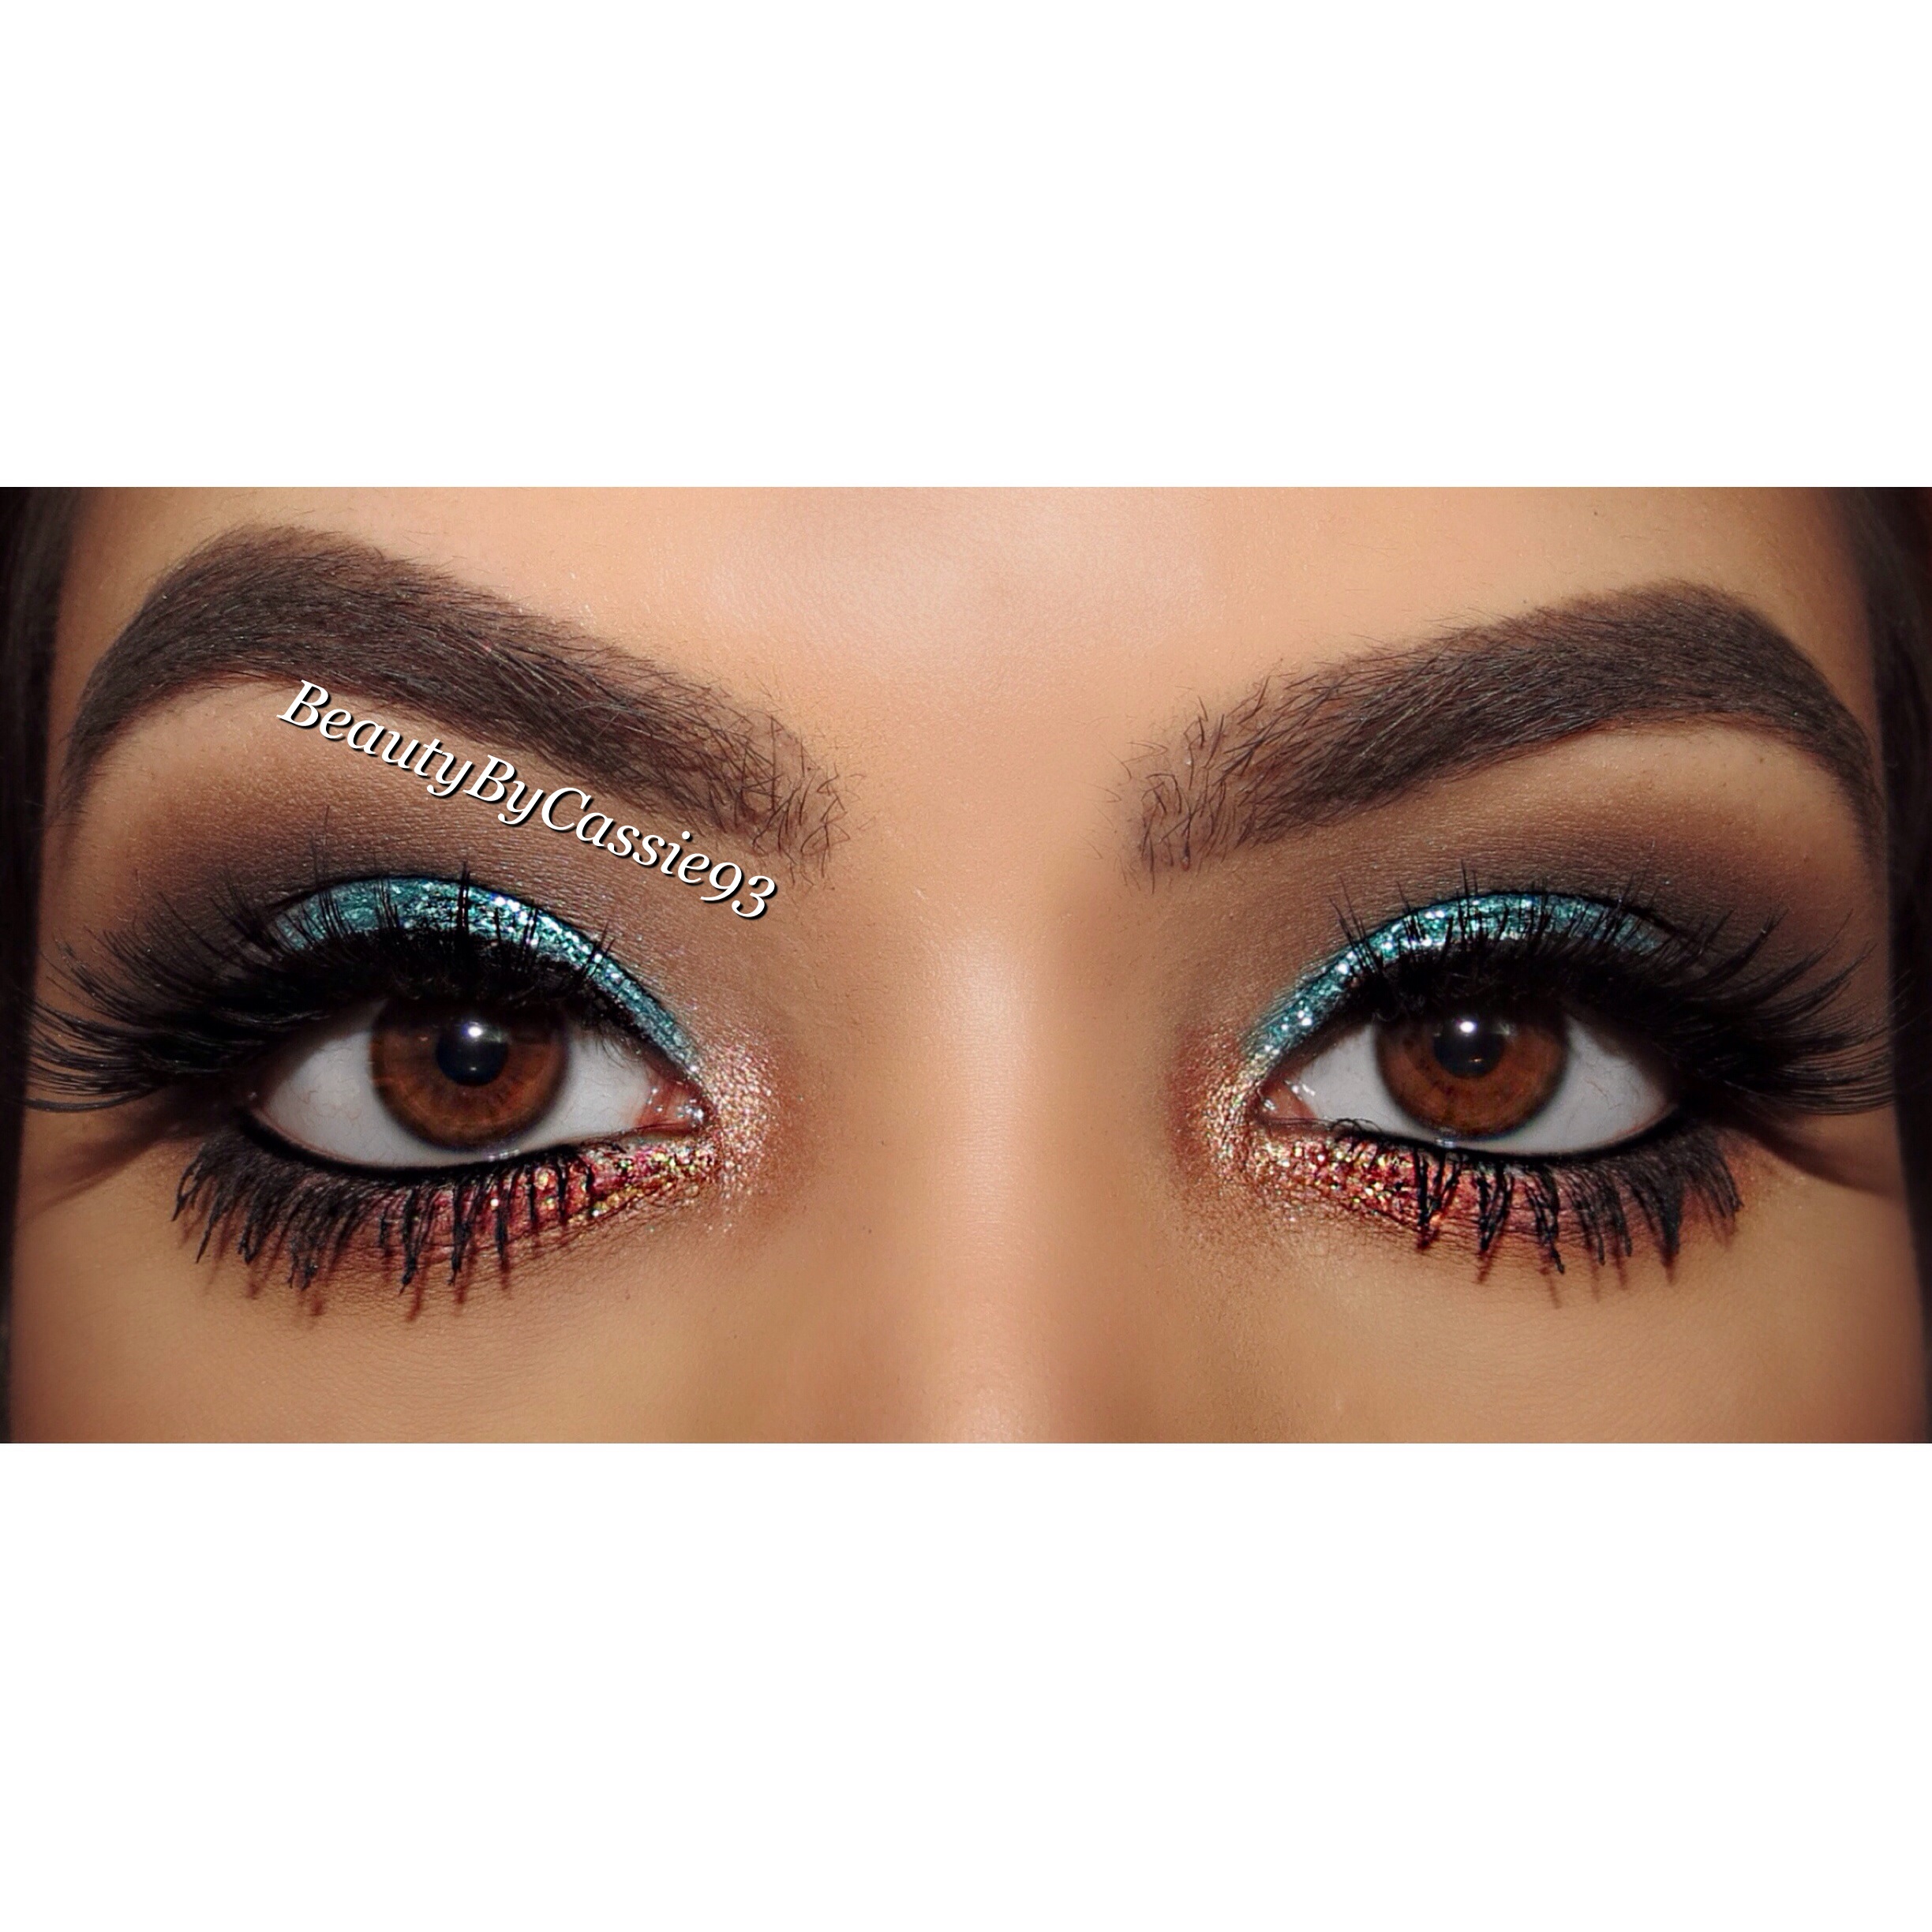
Recently I’ve received Anastasia Beverly Hills’ new beauty blogger palettes–the Maya Mia Palette and Tamanna Palette–and have been playing around with a bunch of different looks ranging from simple everyday looks to full on dramatic ones.  I’m really impressed with the quality of the shadows in each palette.  They’re super pigmented and easy to blend.

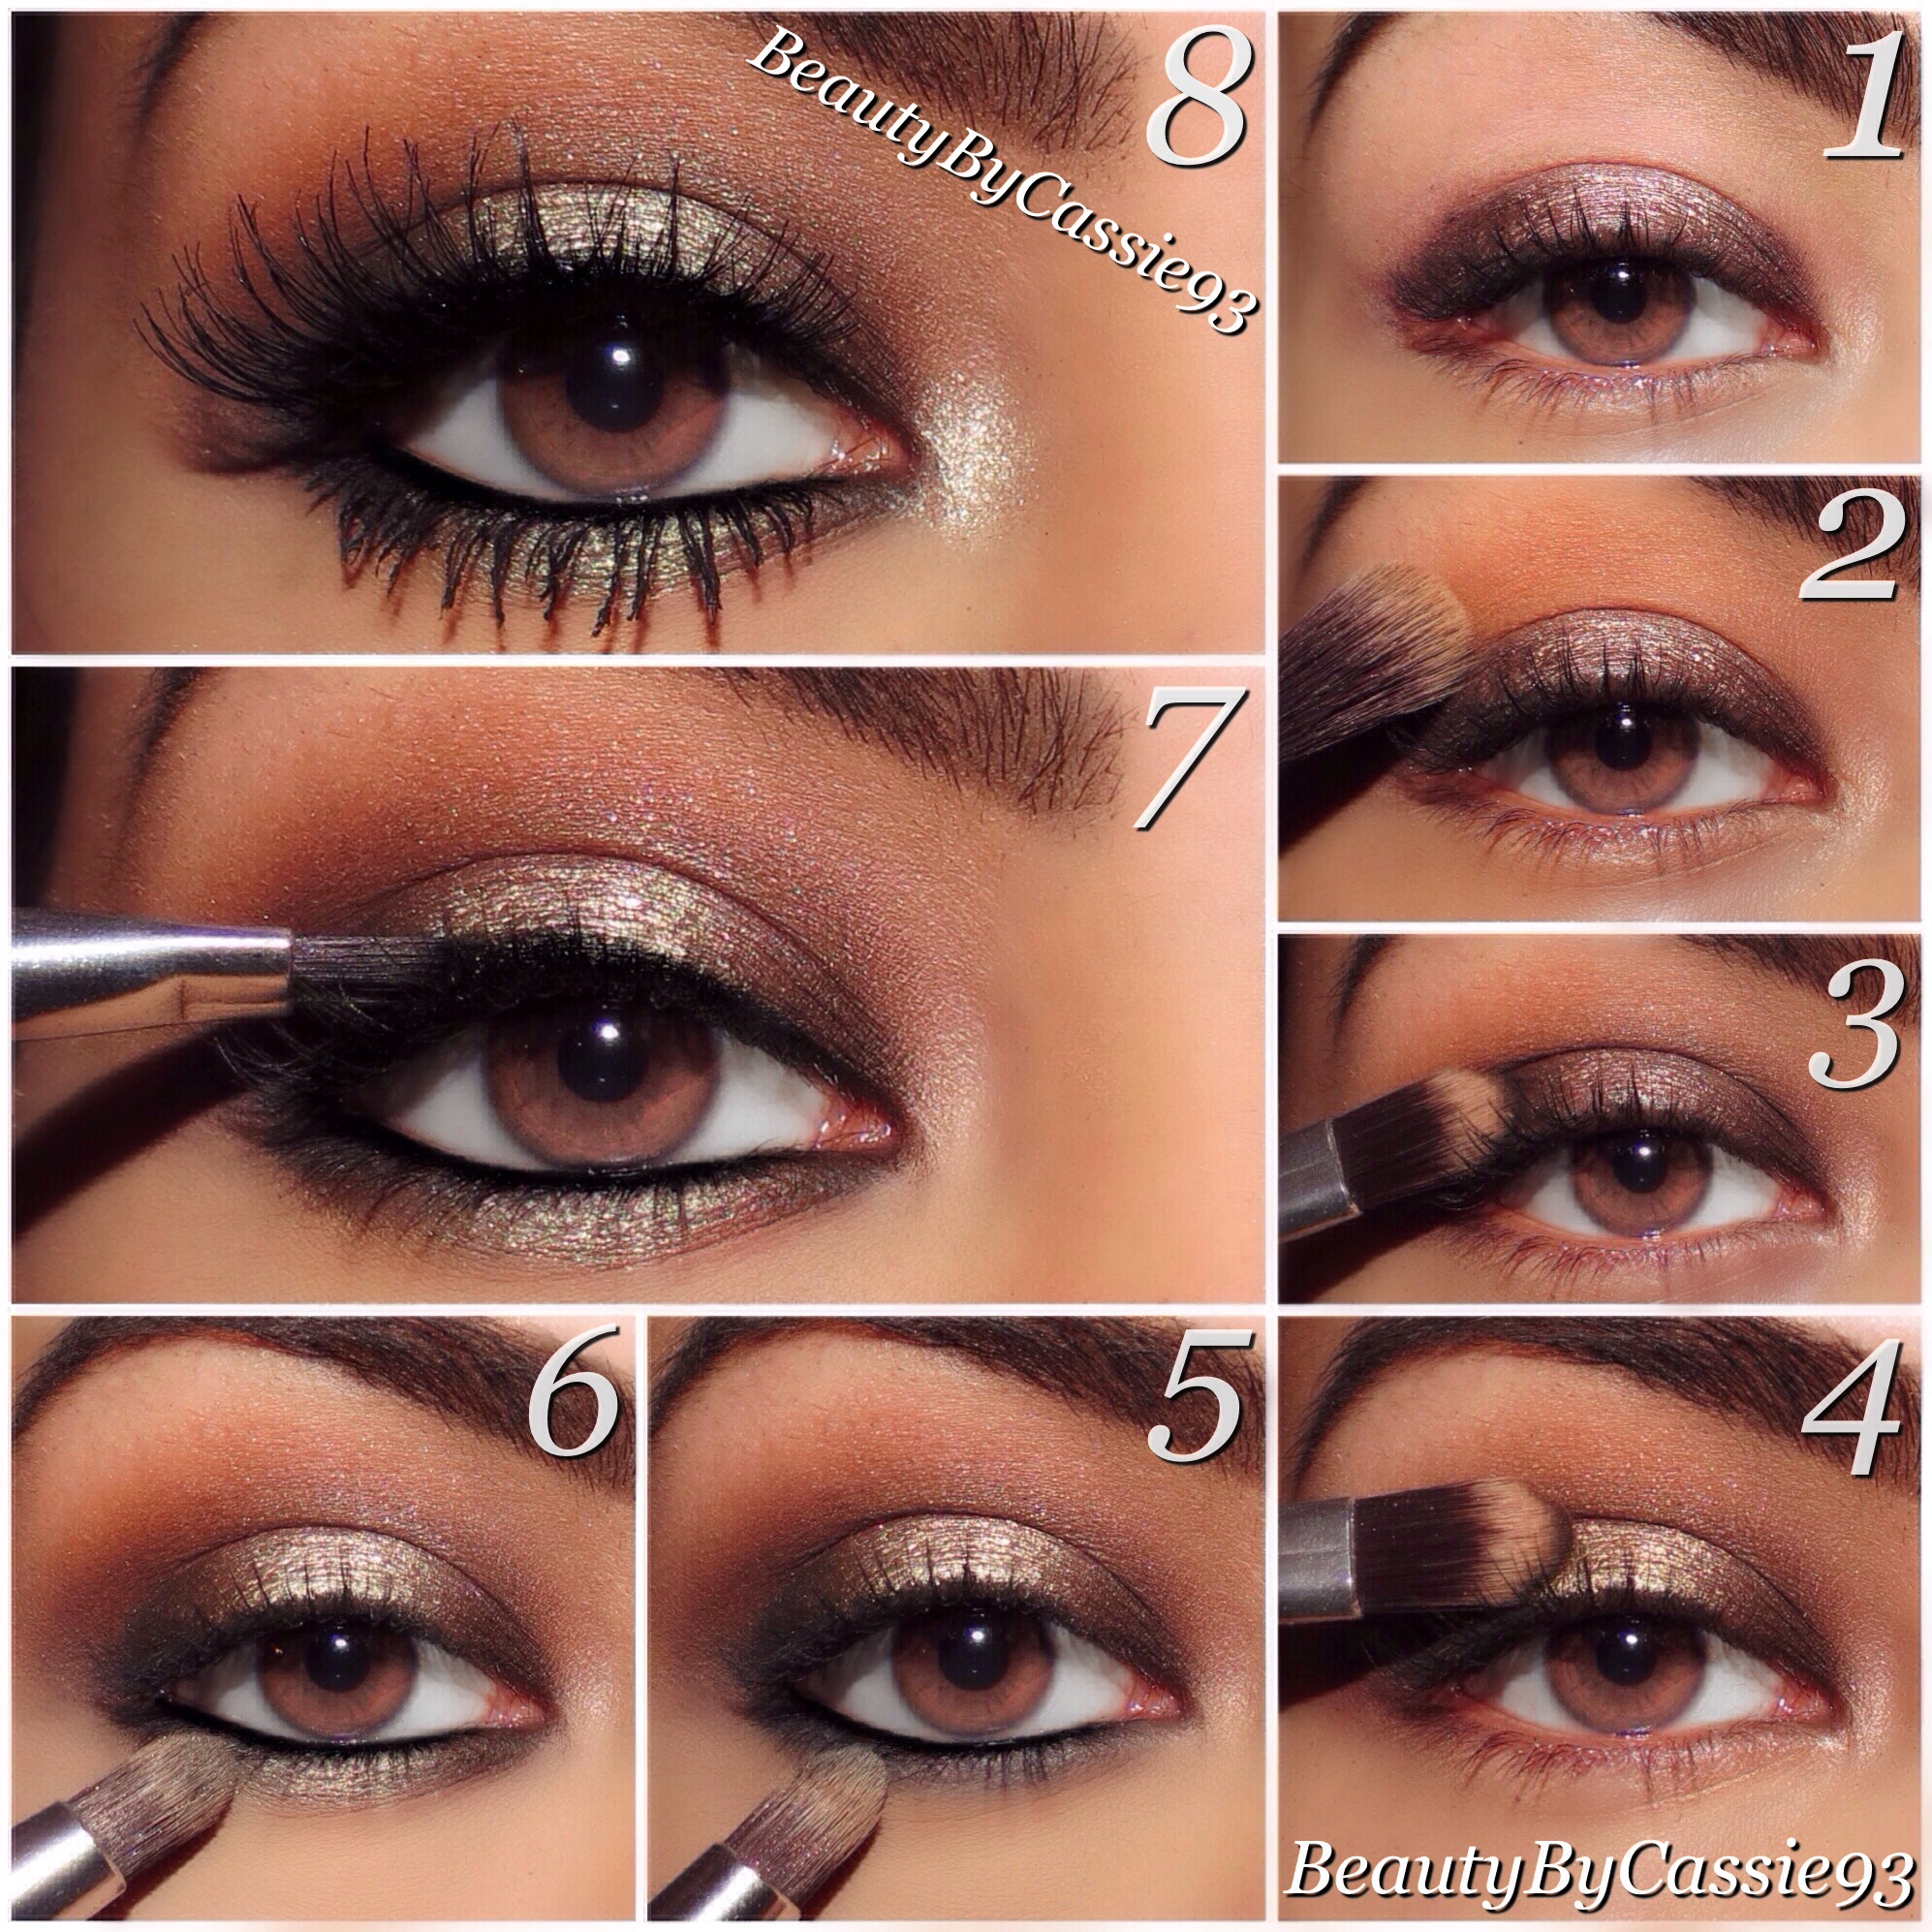
Here is a look I created using both of the palettes.  It’s perfect for going out at night.  It’s an almost all matte look with some shimmer in the inner corners of the eyes.

photoTUBAKSZP

photo46OOOEIS

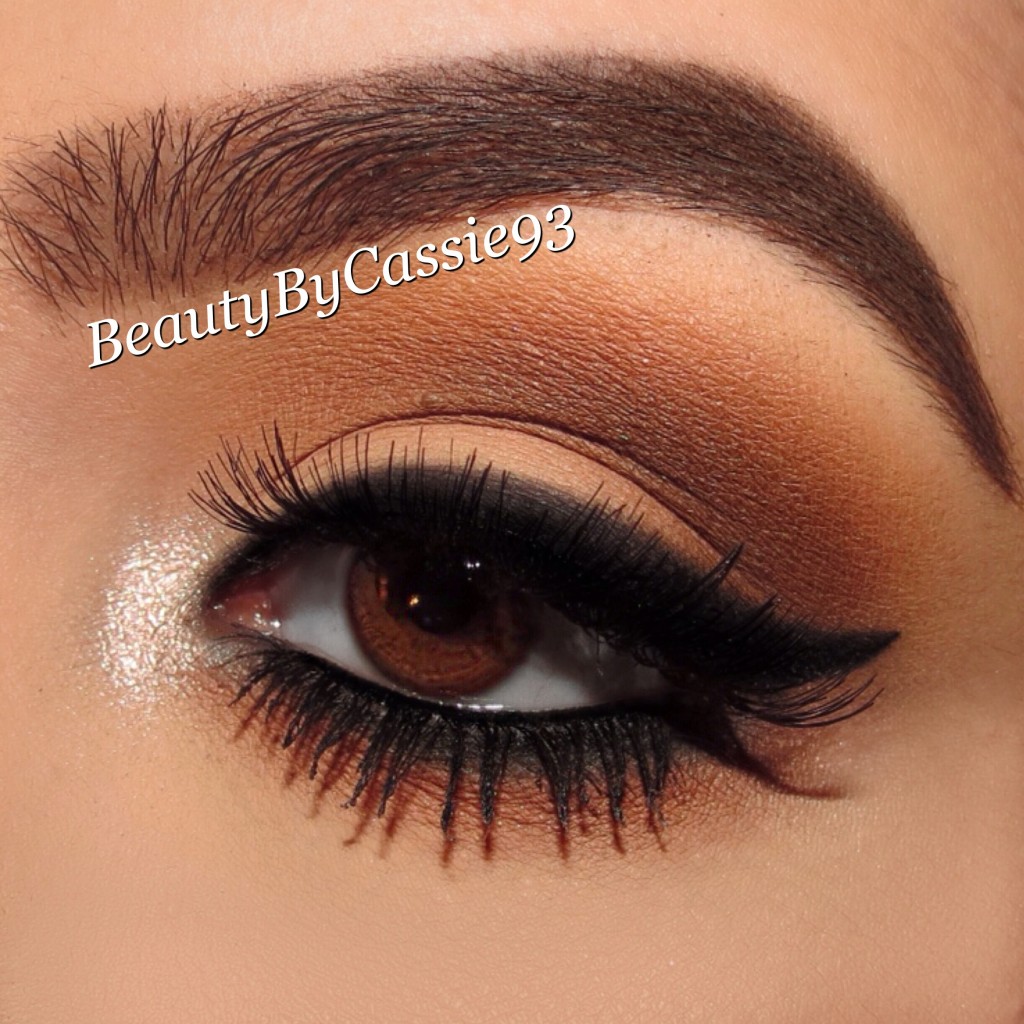
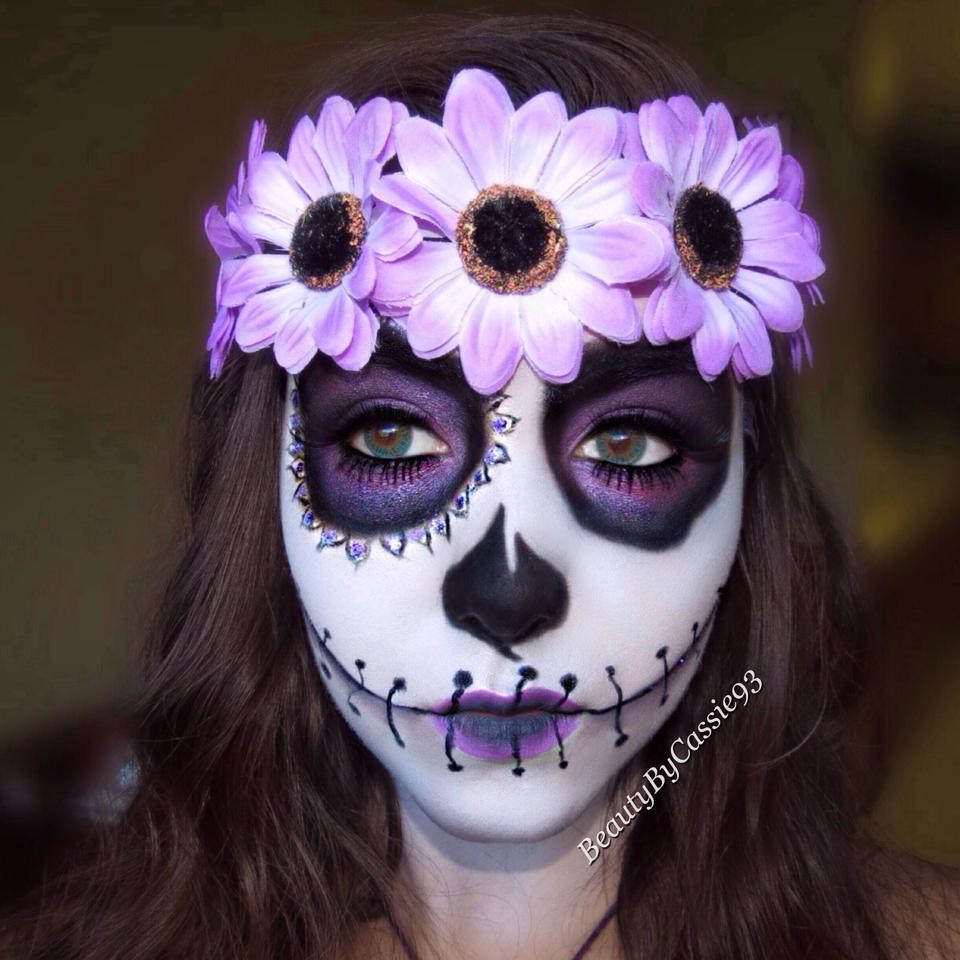
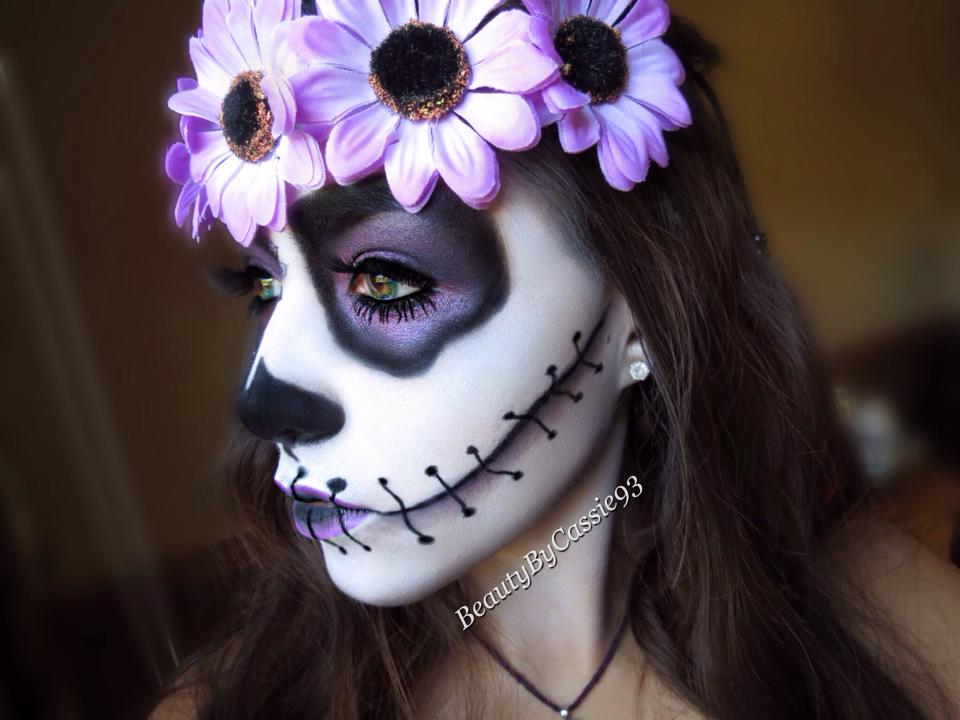
I used the @anastasiabeverlyhills Maya Mia and Tamanna Palettes, ABH Waterproof Crème Color in Jet, # 415 Black lashes by @elegantlashes, @anastasiabeverlyhills Dipbrow in Dark Brown, and @hairandmakeupaddiction brushes.

Product info:
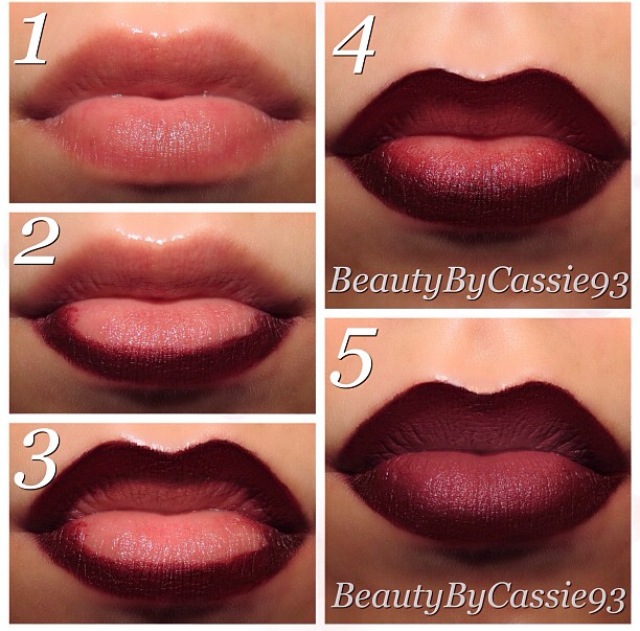
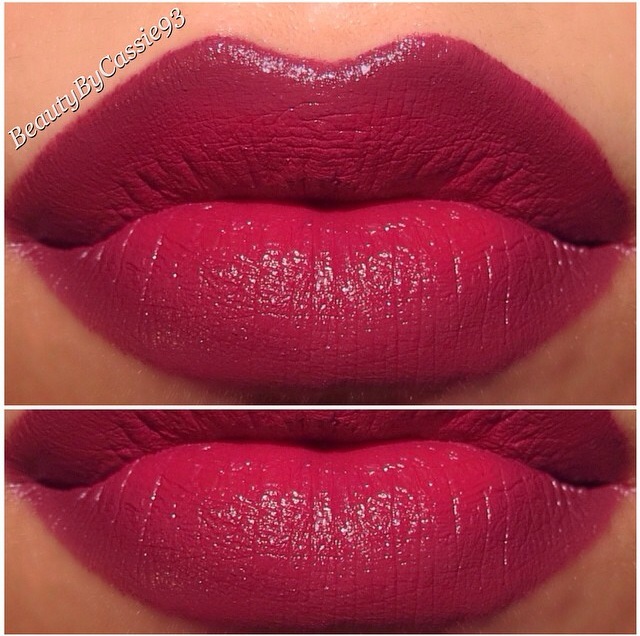
1.) Prime your lid(I used Urban Decay Anti-aging Primer Potion).
2.) Apply Fresh all over your lid with a flat shader brush.
3.) Blend Caramel into your crease using a fluffy blending brush.
4.) Deepen your crease with Deep Brown using a crease brush.
5.) Line your upper lash line with the Waterproof Crème Color in Jet and smudge Noir over top.
6.) Line your lower lash line with Noir and blend out with Caramel.
7.) Line your waterline with Tarte Cosmetics Skinny SmolderEYES in Onyx.
8.) Apply @tartecosmetics Lights, Camera, Lashes mascara, # 415 @elegantlashes, and highlight your tear duct with Blush.
On my brows, I used @anastasiabeverlyhills Dipbrow in Dark Brown.
**Use the code BeautyByCassie93 at checkout on your Elegant Lashes order and receive a free pair of # 415 Black lashes.


Tutorial: Metallic Light Blue Smokey Eye

Tutorial: How to create a metallic light blue smokey eye using @colourpopcosmetics eyeshadow in Sugar, @eyekandycosmetics glitter in Chocolate Chip, the @urbandecaycosmetics Naked Palette, # 047 lashes by @elegantlashes, and @hairandmakeupaddiction brushes.

Product info:
1)Apply Maybelline Color Tattoo in Test My Teal to lid(I already primed my eye with Urban Decay Anti-Aging Primer Potion).
2)Apply Buck to your crease.
3)Apply Sugar to your lid.
4)Blend a darker matte brown into your crease.
4)Line your upper lash line with Creep.
6)Blend Hustle into your crease.
7)Line your lower lash line with a dark matte brown and Buck.
8)Apply Chocolate Chip glitter to your lower lash line.
9)Apply Givenchy Phenomen’Eyes mascara to lower lashes, # 047 Black @elegantlashes, line your waterline with a black pencil, and highlight your inner corner with a shimmery champagne shadow.
Brows are @anastasiabevelyhills Brow Powder Duo in Medium Brown.

Tutorial: Smokey bronze eyes

Smokey bronze eyes using the @toofaced A Few of My Favorite Things palette, Demi Wispies by @ardell_lashes, and @hairandmakeupaddiction brushes.

First start off by applying Maybelline Color Tattoo in Bad to the Bronze to center of the lid and apply Maybelline Color Tattoo in Rich Mahogany to the outer and inner corner of the lid.  Next, apply Chocolate Milk from the Too Faced palette to your crease.  After that, apply Dark Chocolate from the palette to the outer and inner corner of the lid and blend into the crease.  Next, apply Tinsel to the center of the lid.  Then, apply Anastasia Beverly Hills Covet Waterproof Eyeliner in Noir to the waterline and smudge out.  Next, apply Tinsel to the center of your lower lash line and Dark Chocolate to the outer and inner corner of the lower lash line.  Later, line the upper lash line with Pure Glam from the Too Faced palette. Next, apply Jordana Best Lash Extreme mascara and Ardell Demi Wispies.  Also, highlight your tear duct with Snowflakes from the palette.  bronze2