Monthly Archives: October 2014

Halloween Makeup Idea: Sugar Skull

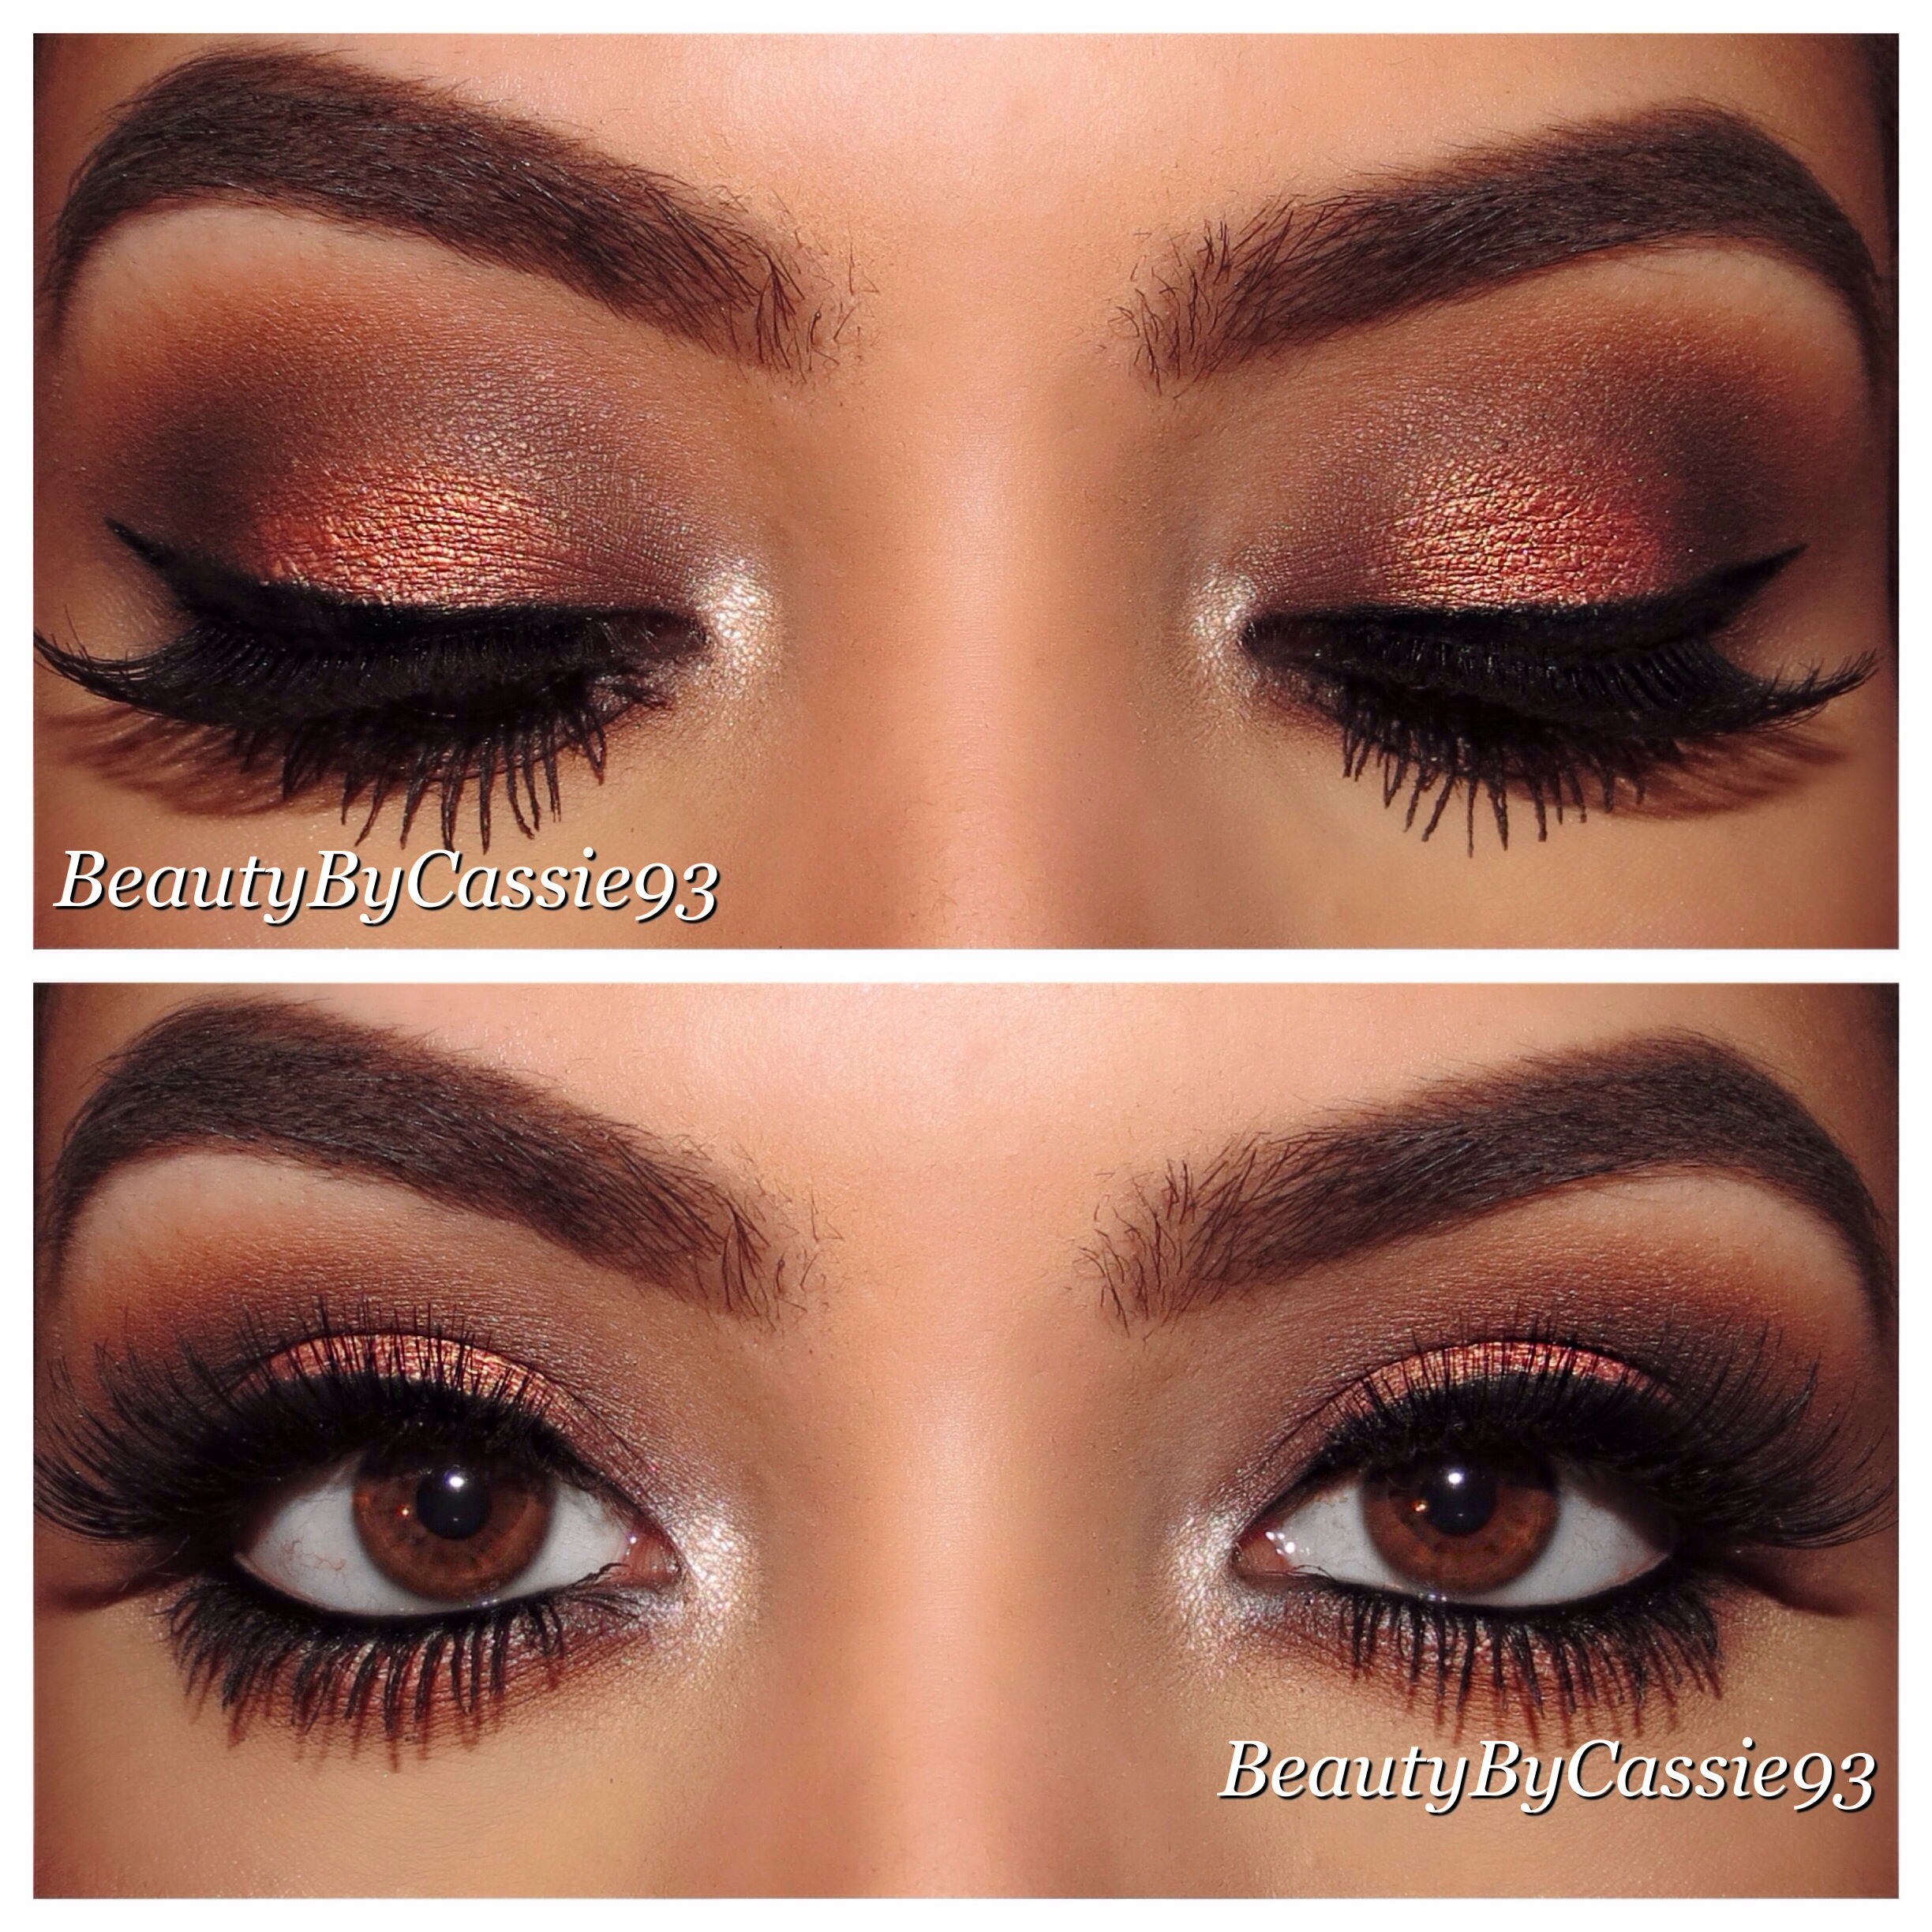
Can’t think of anything to wear this Halloween?  Don’t have a costume? Then think about doing a sugar skull makeup look.  It’s easier than it looks and there’s no wrong way to do it.  Be as creative as you want!

10407552_843464485676817_447559322494470881_n  10151881_843464519010147_3201397024330261076_n  10603588_843464505676815_1998145326804459741_n

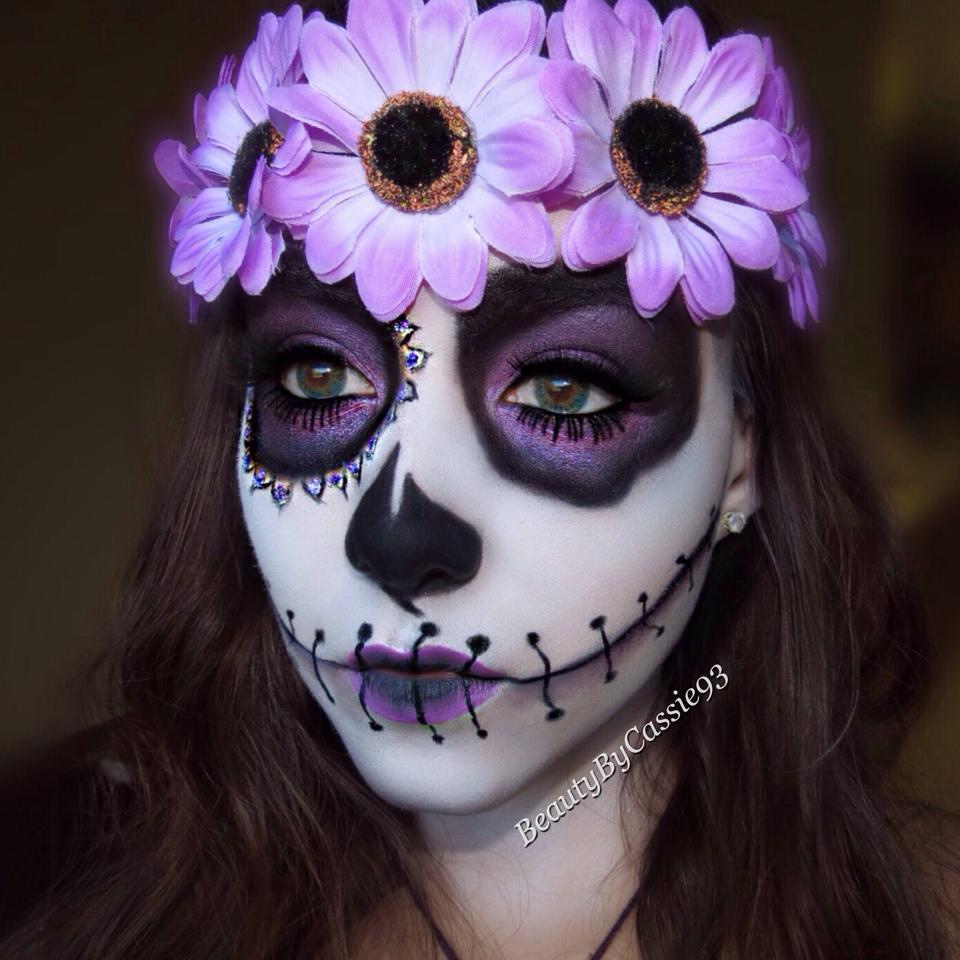
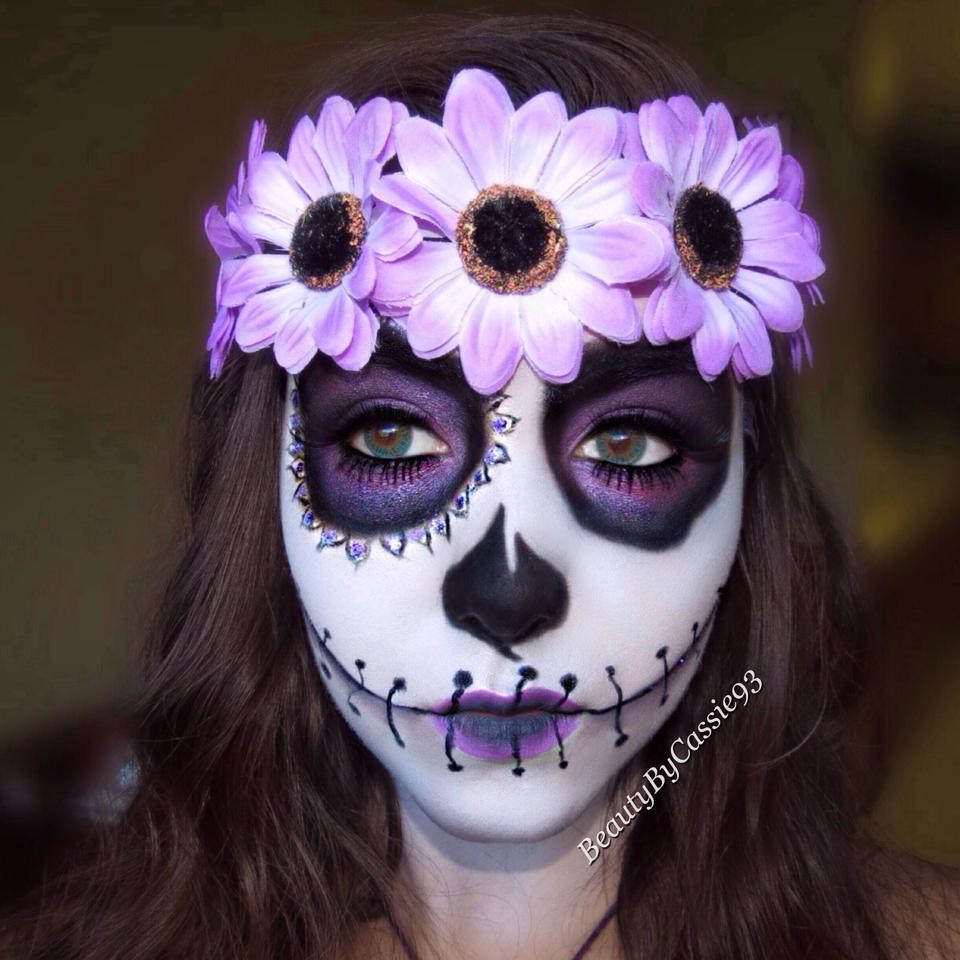
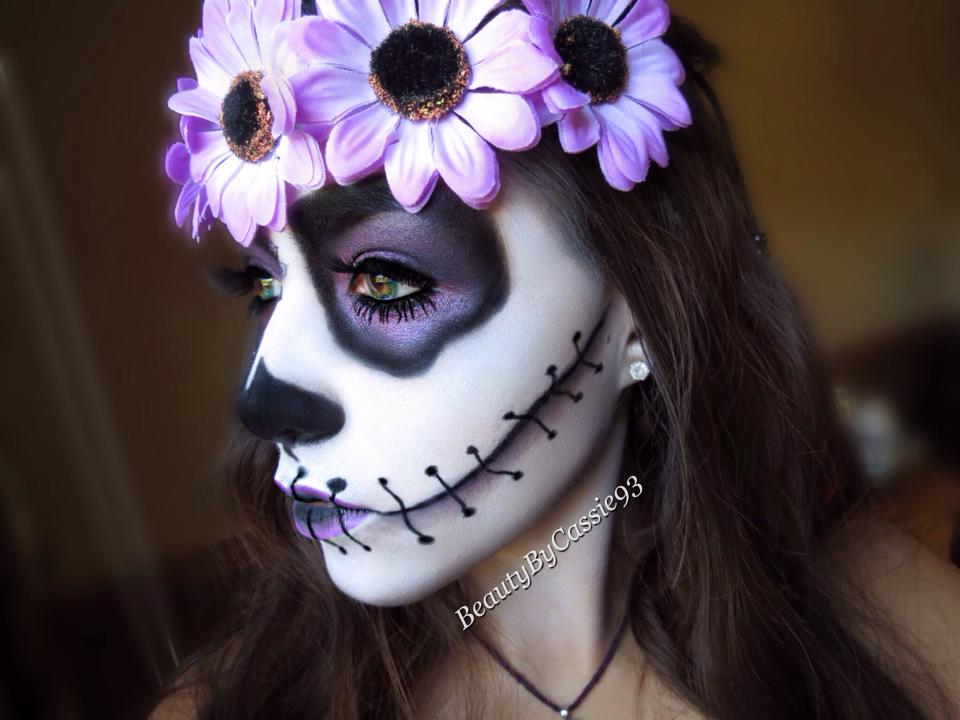
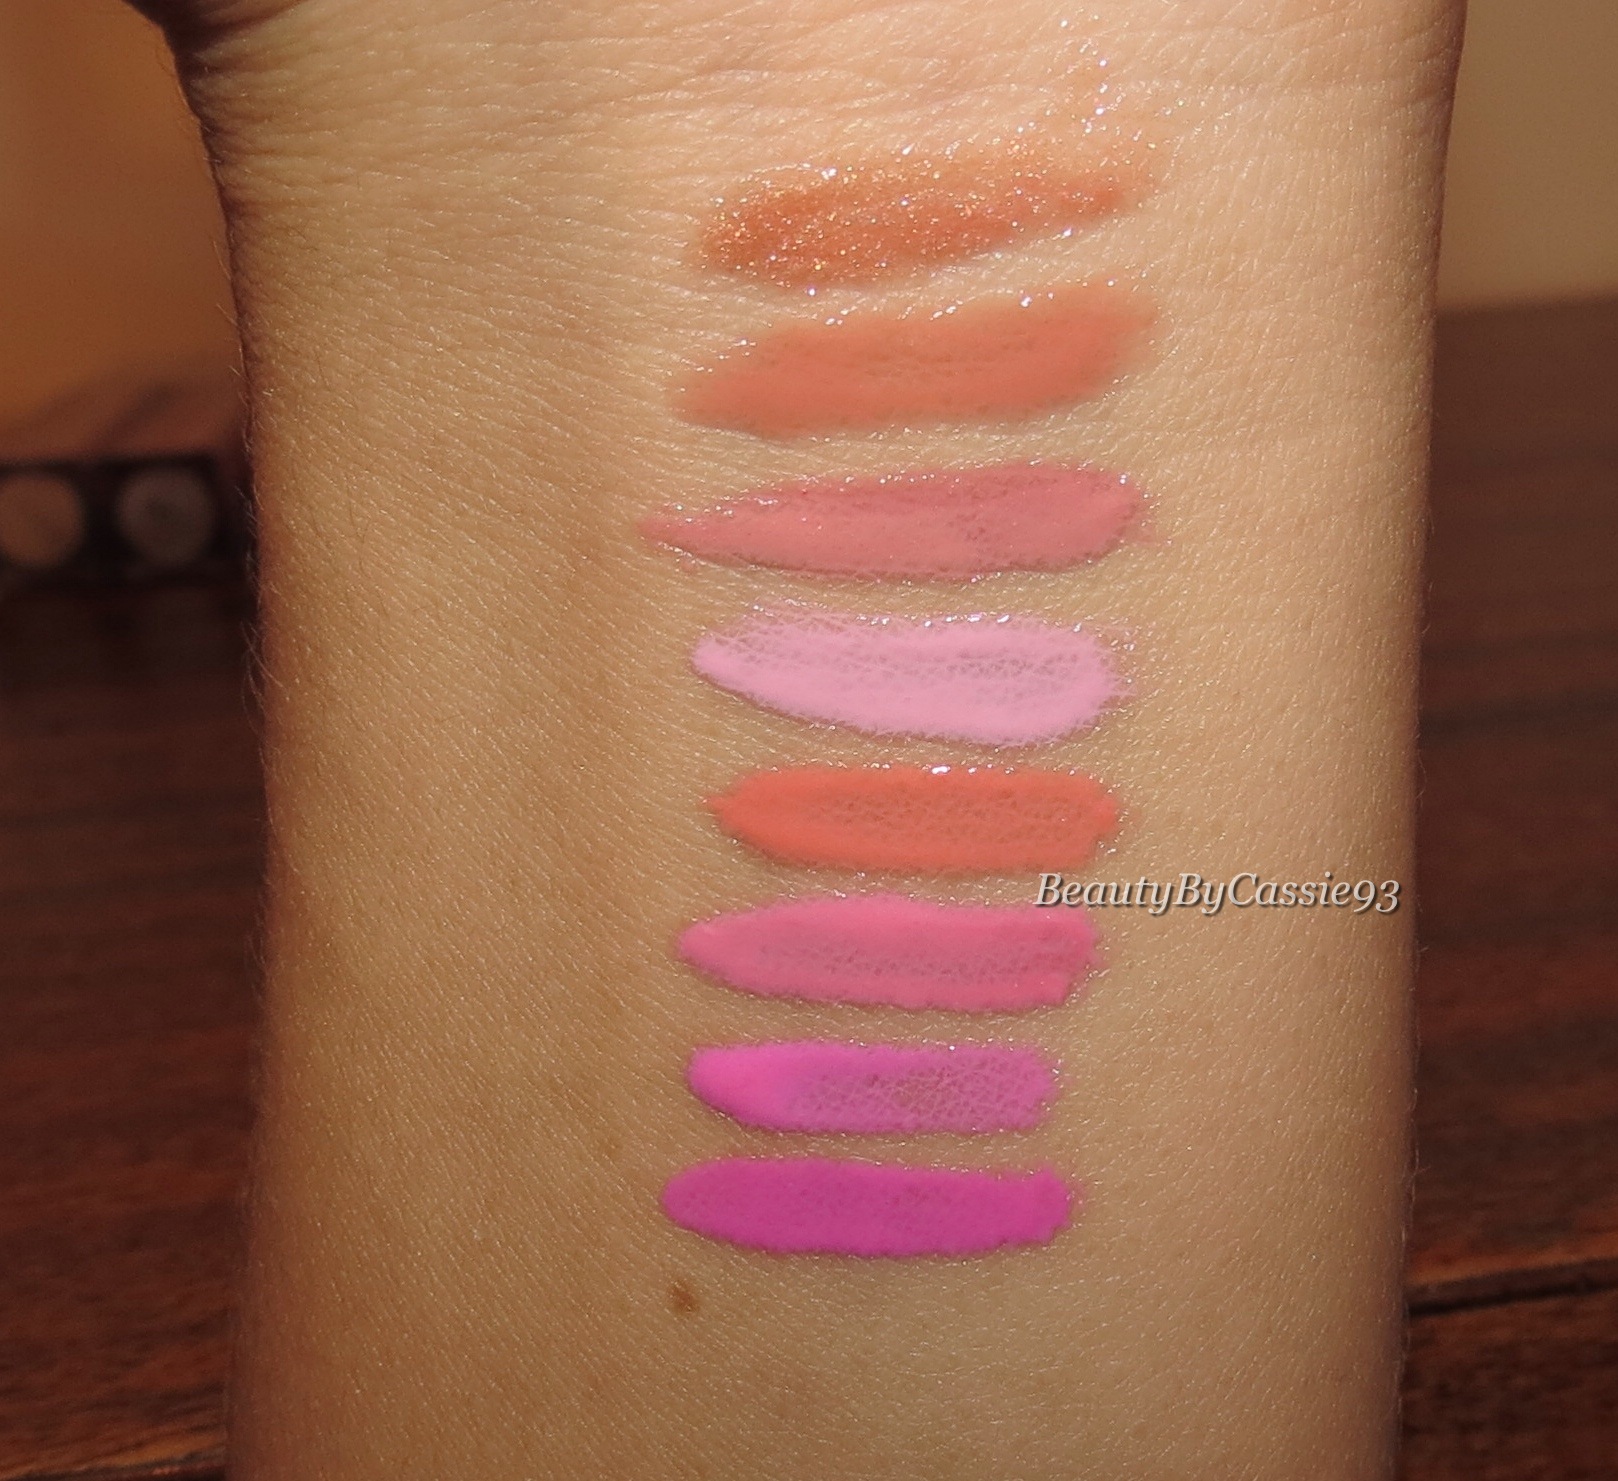
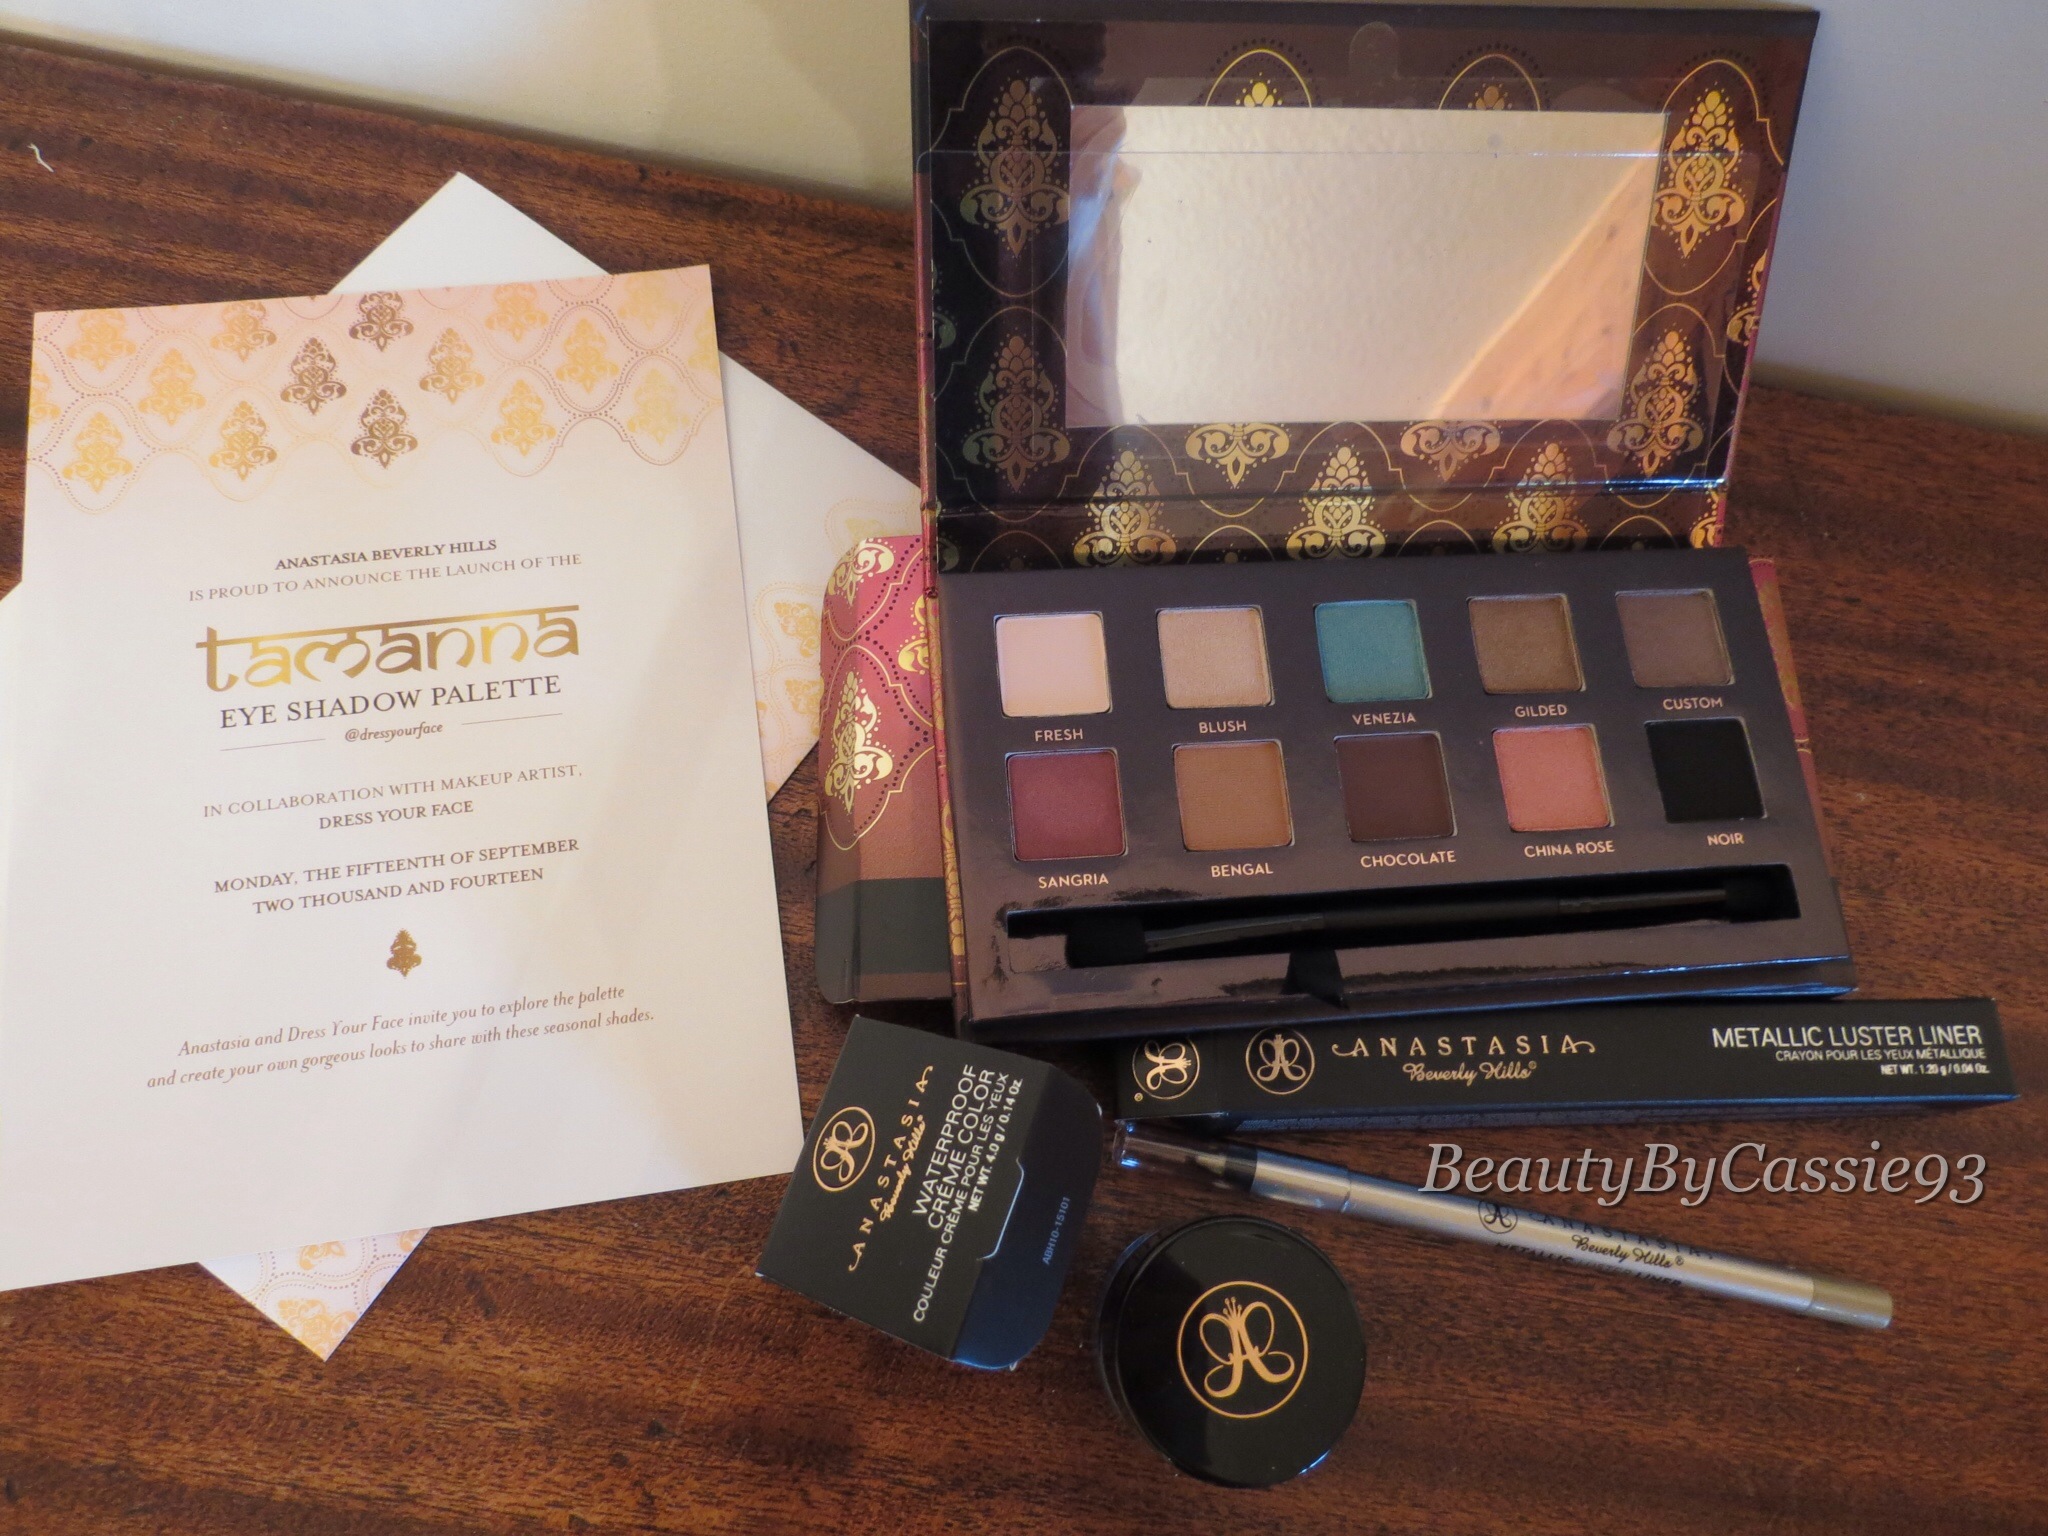
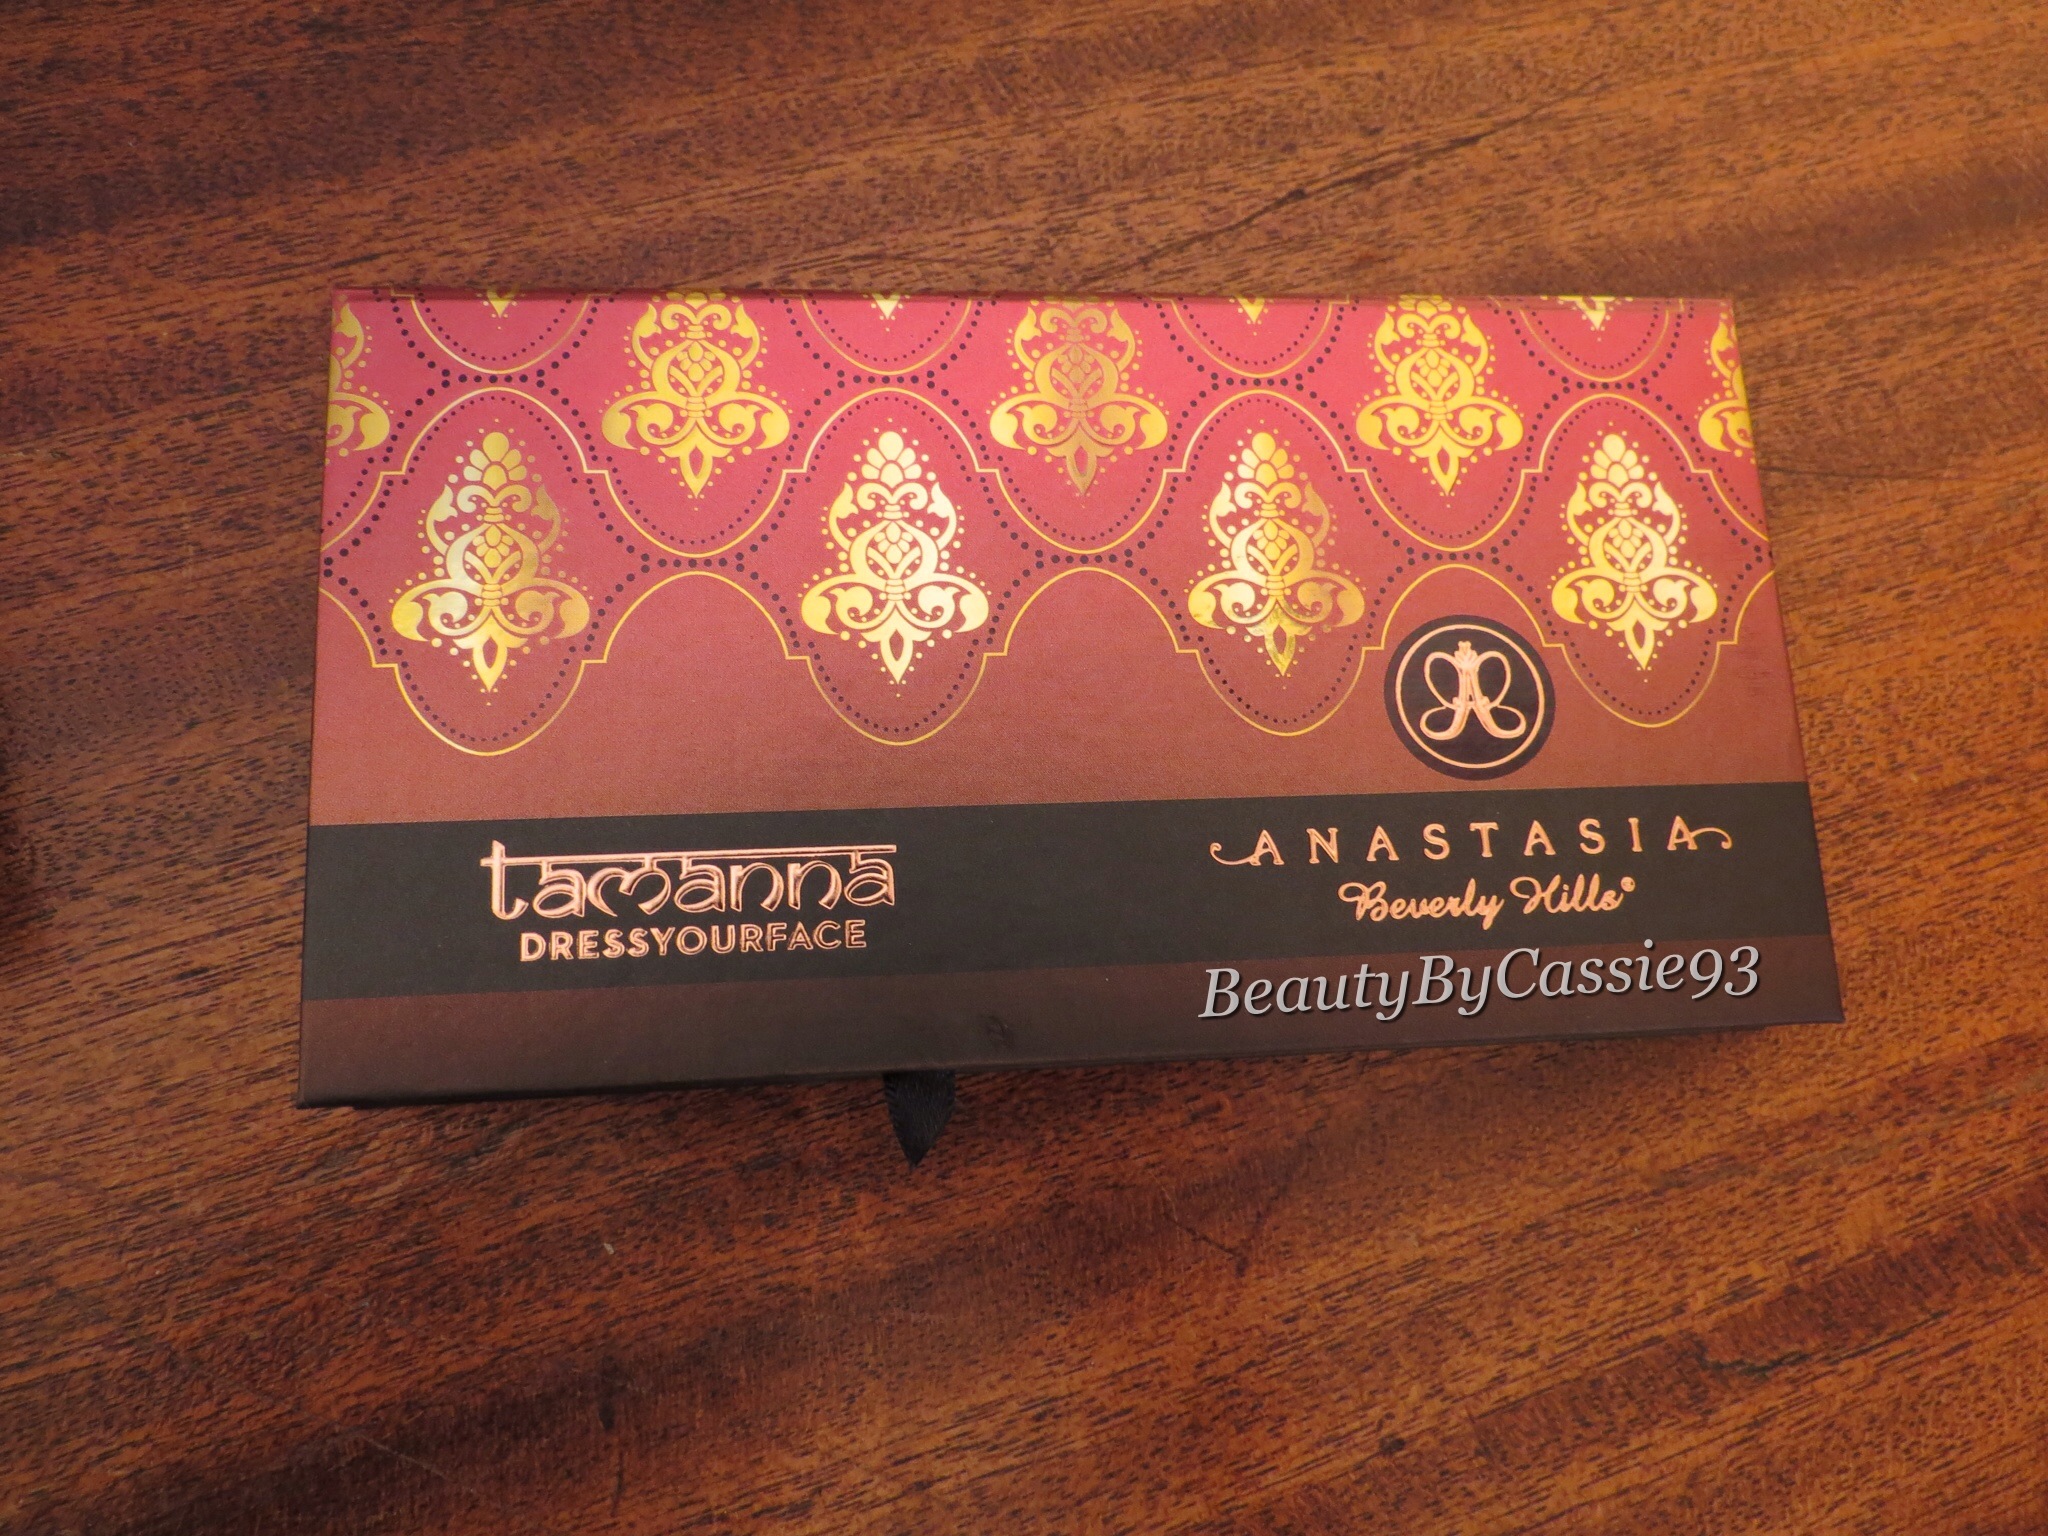
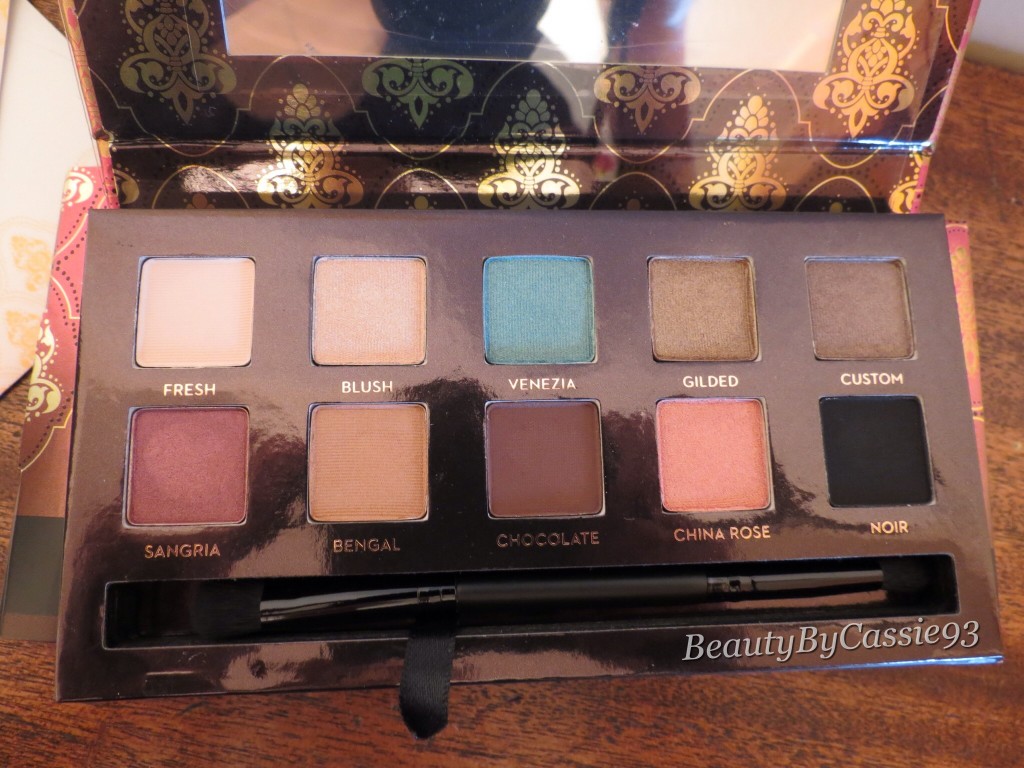
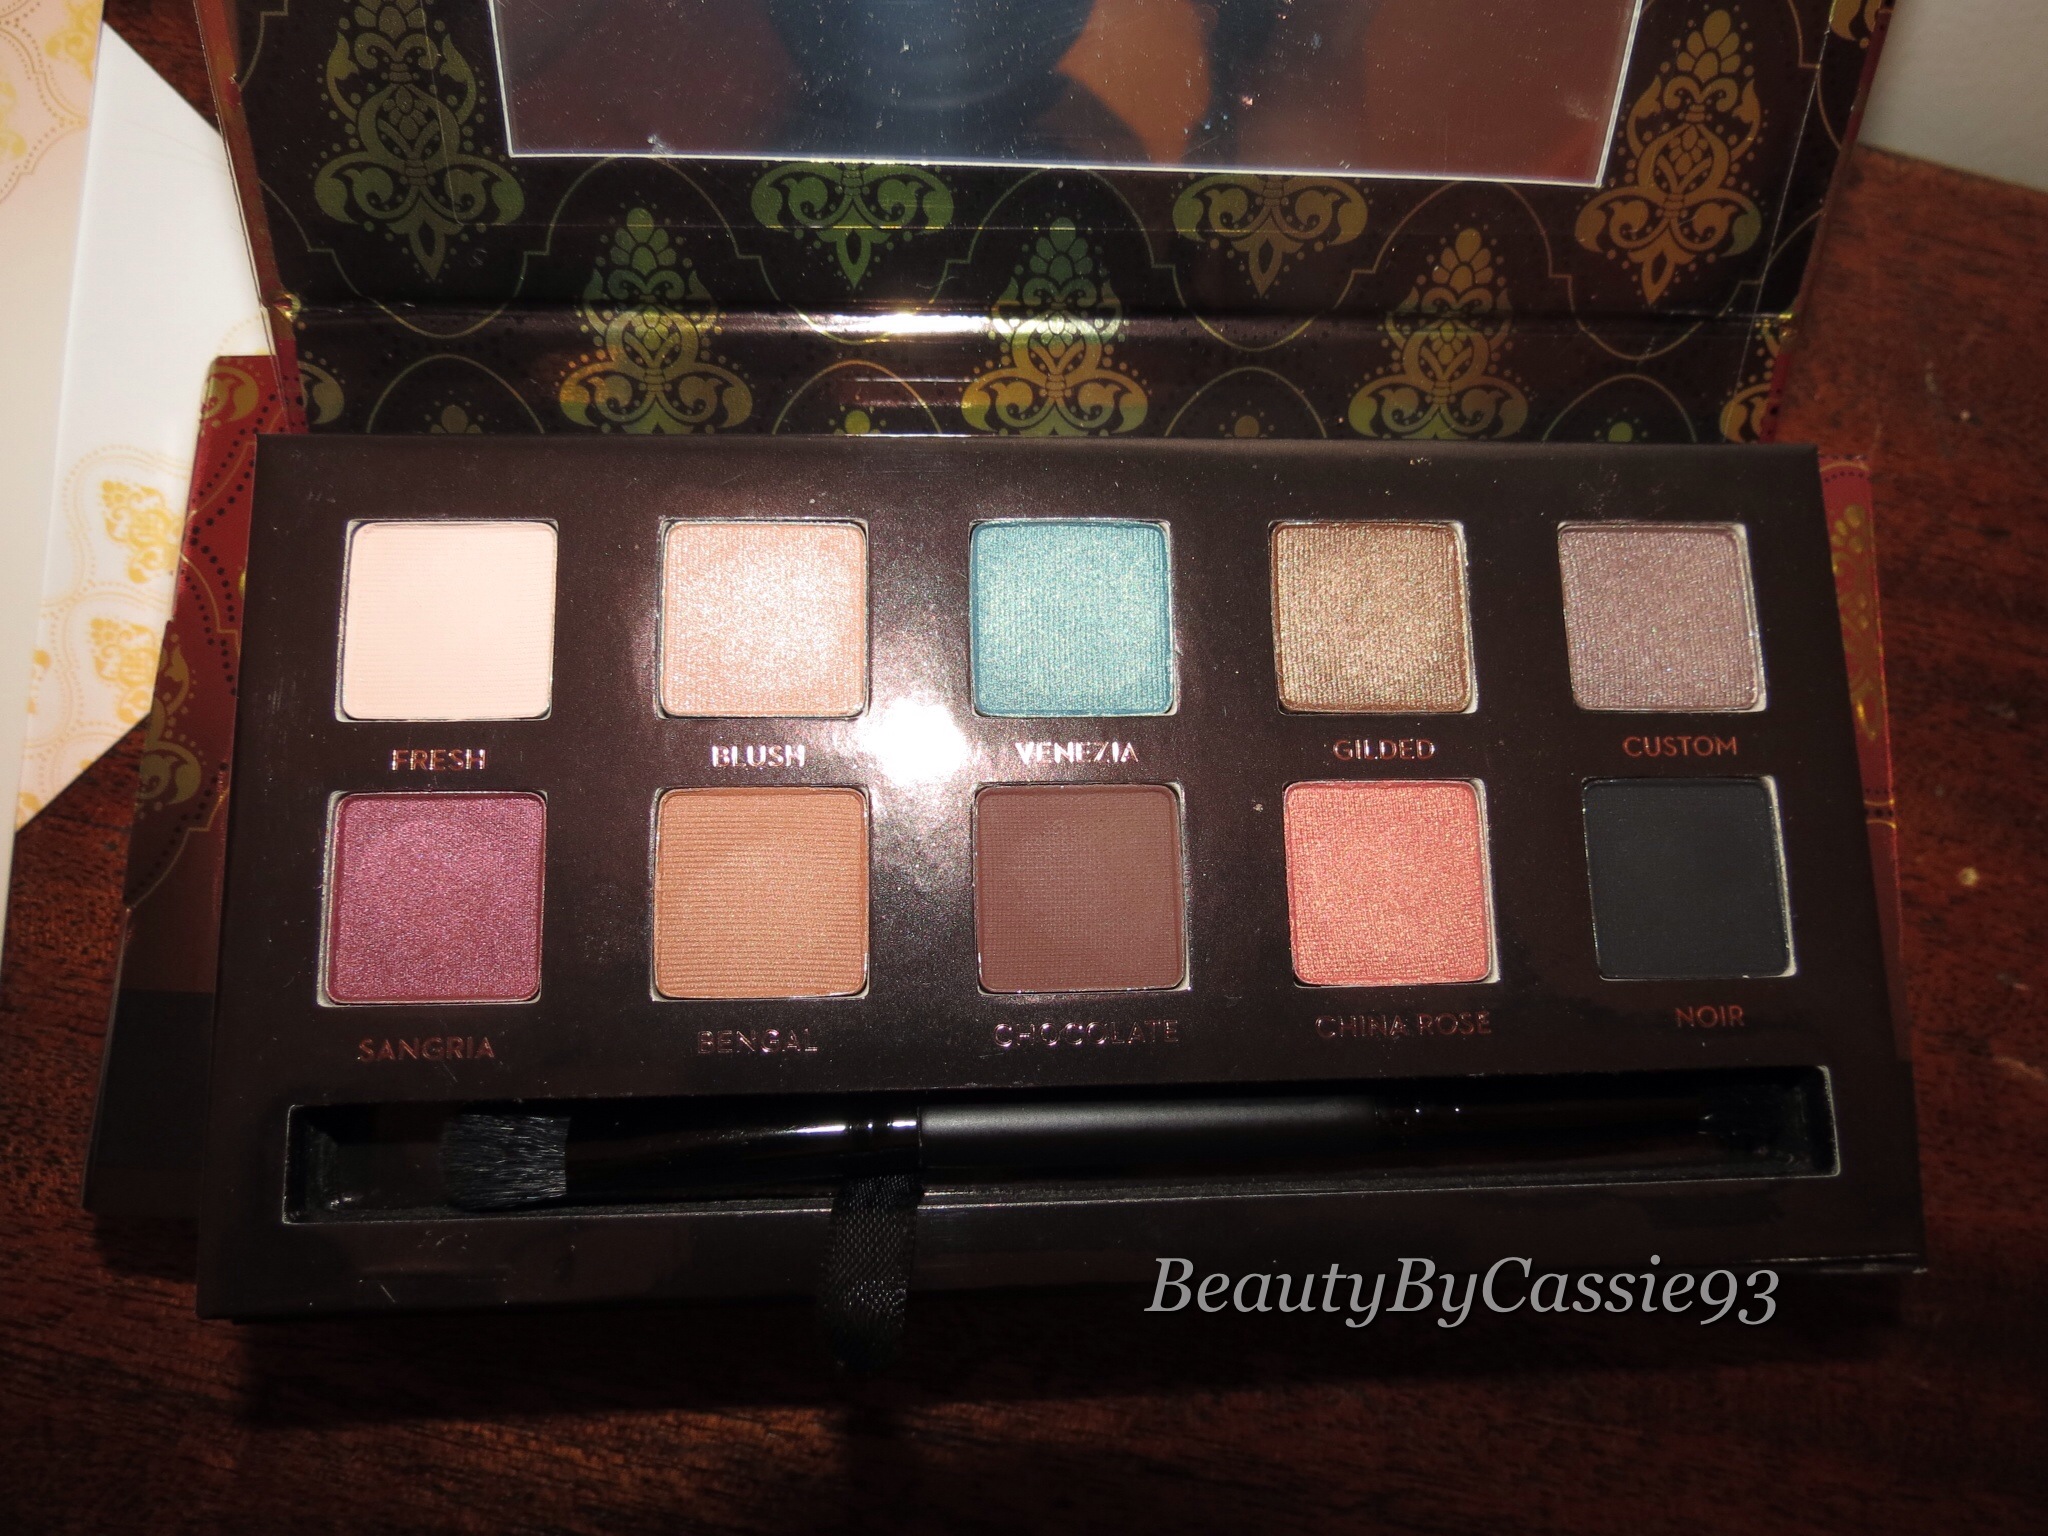
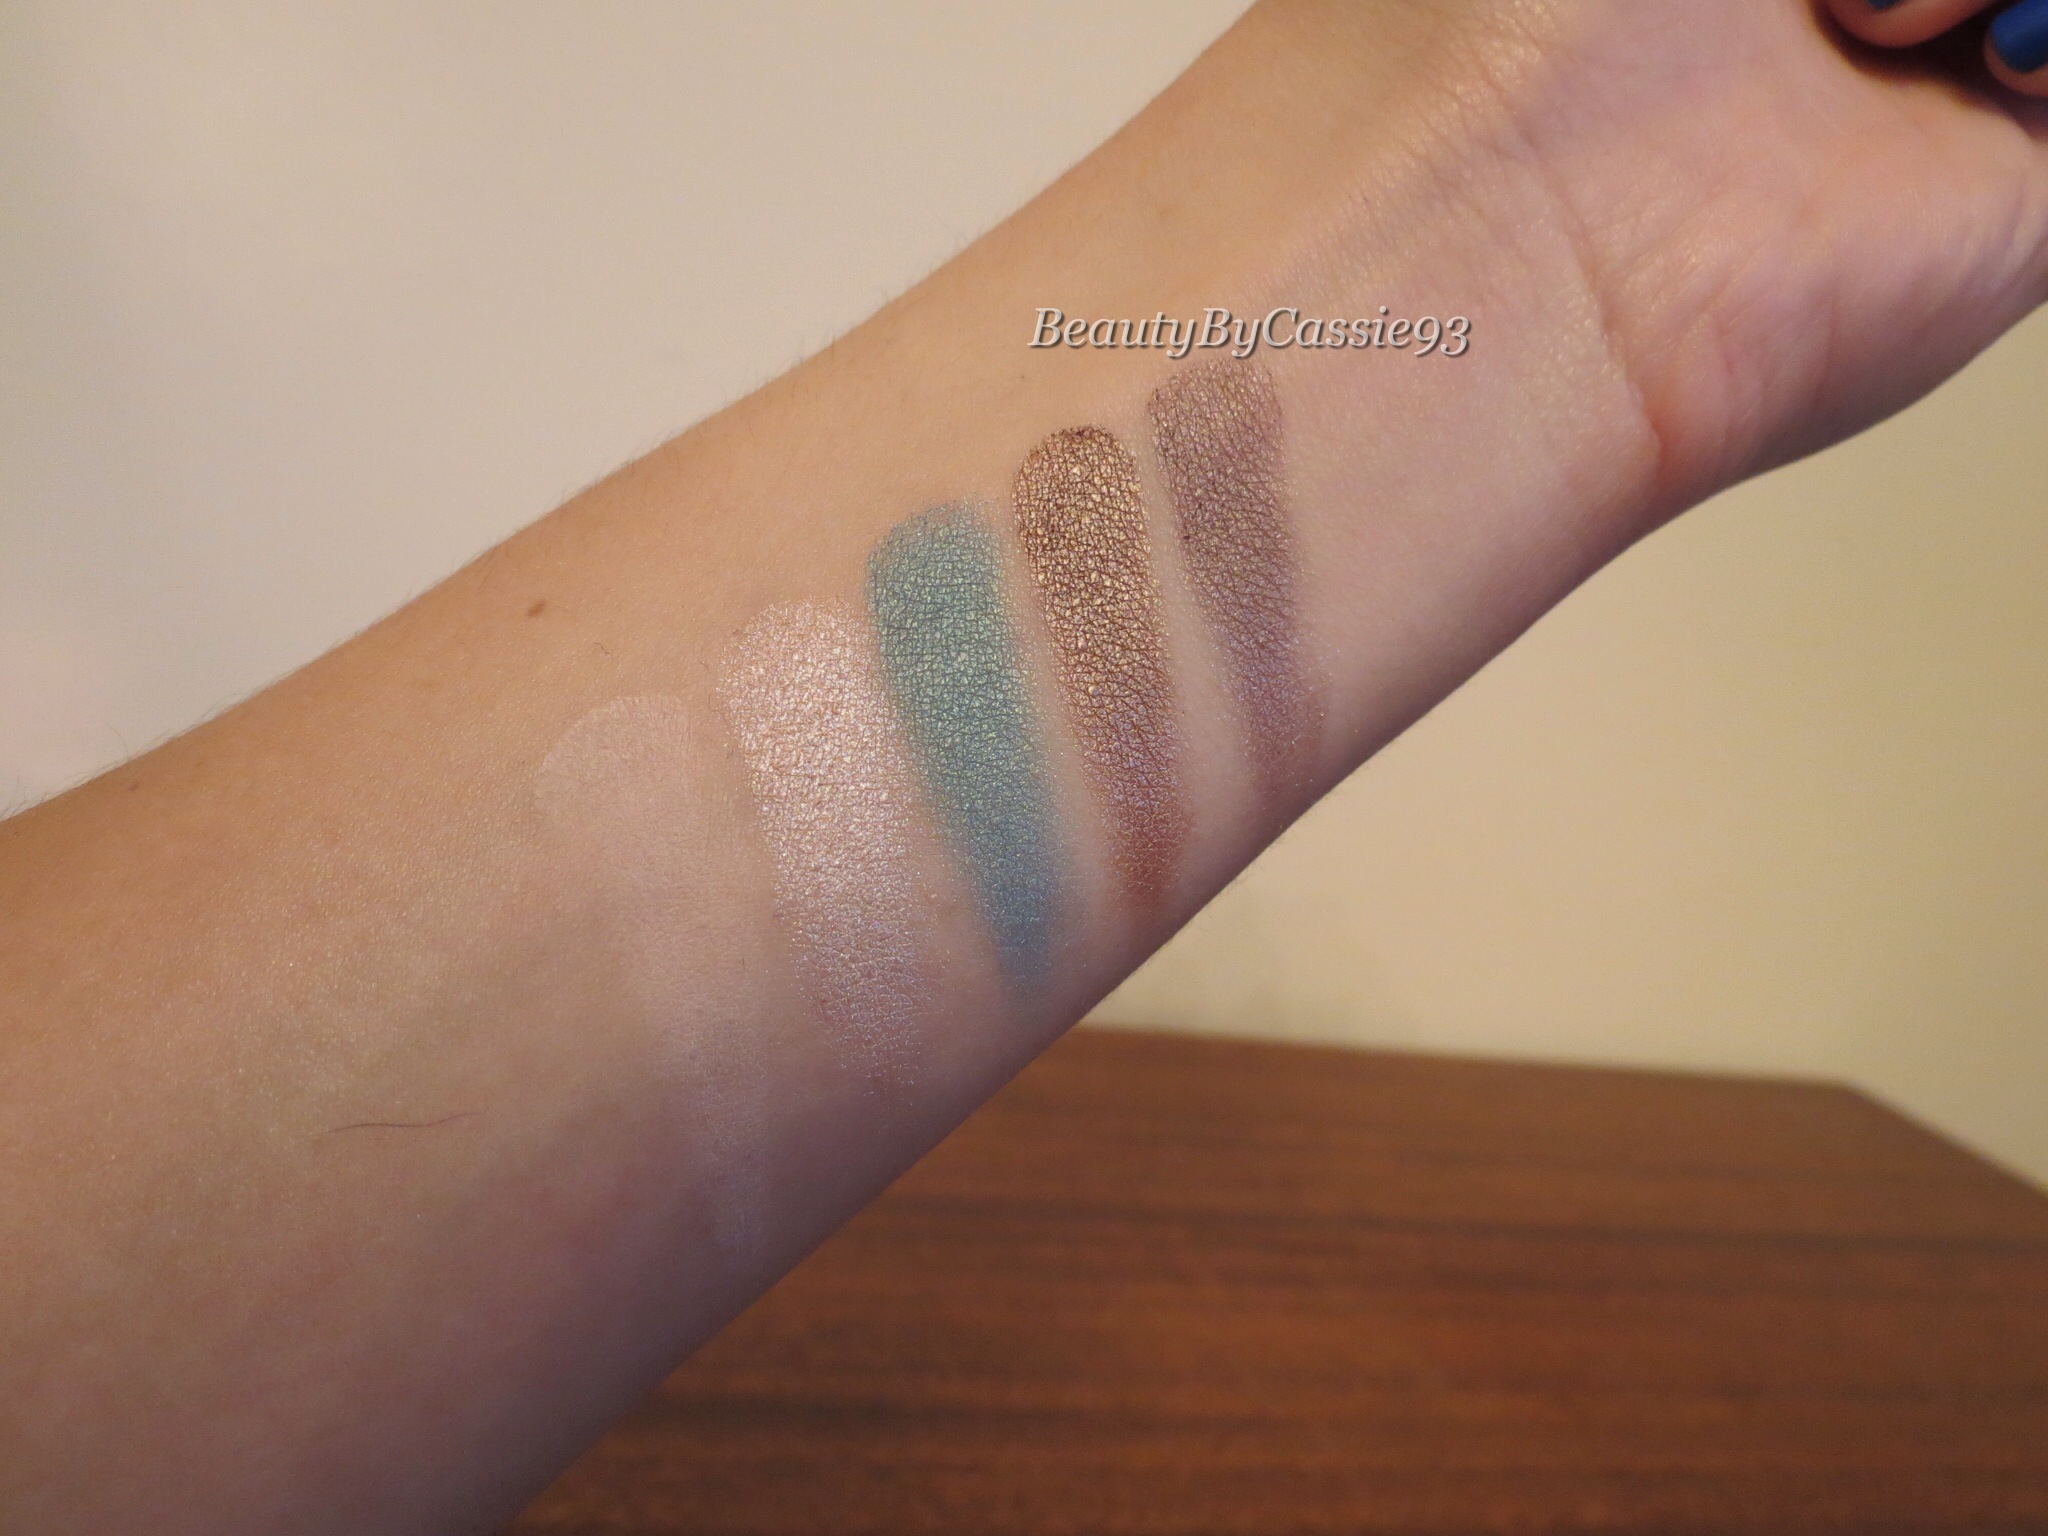
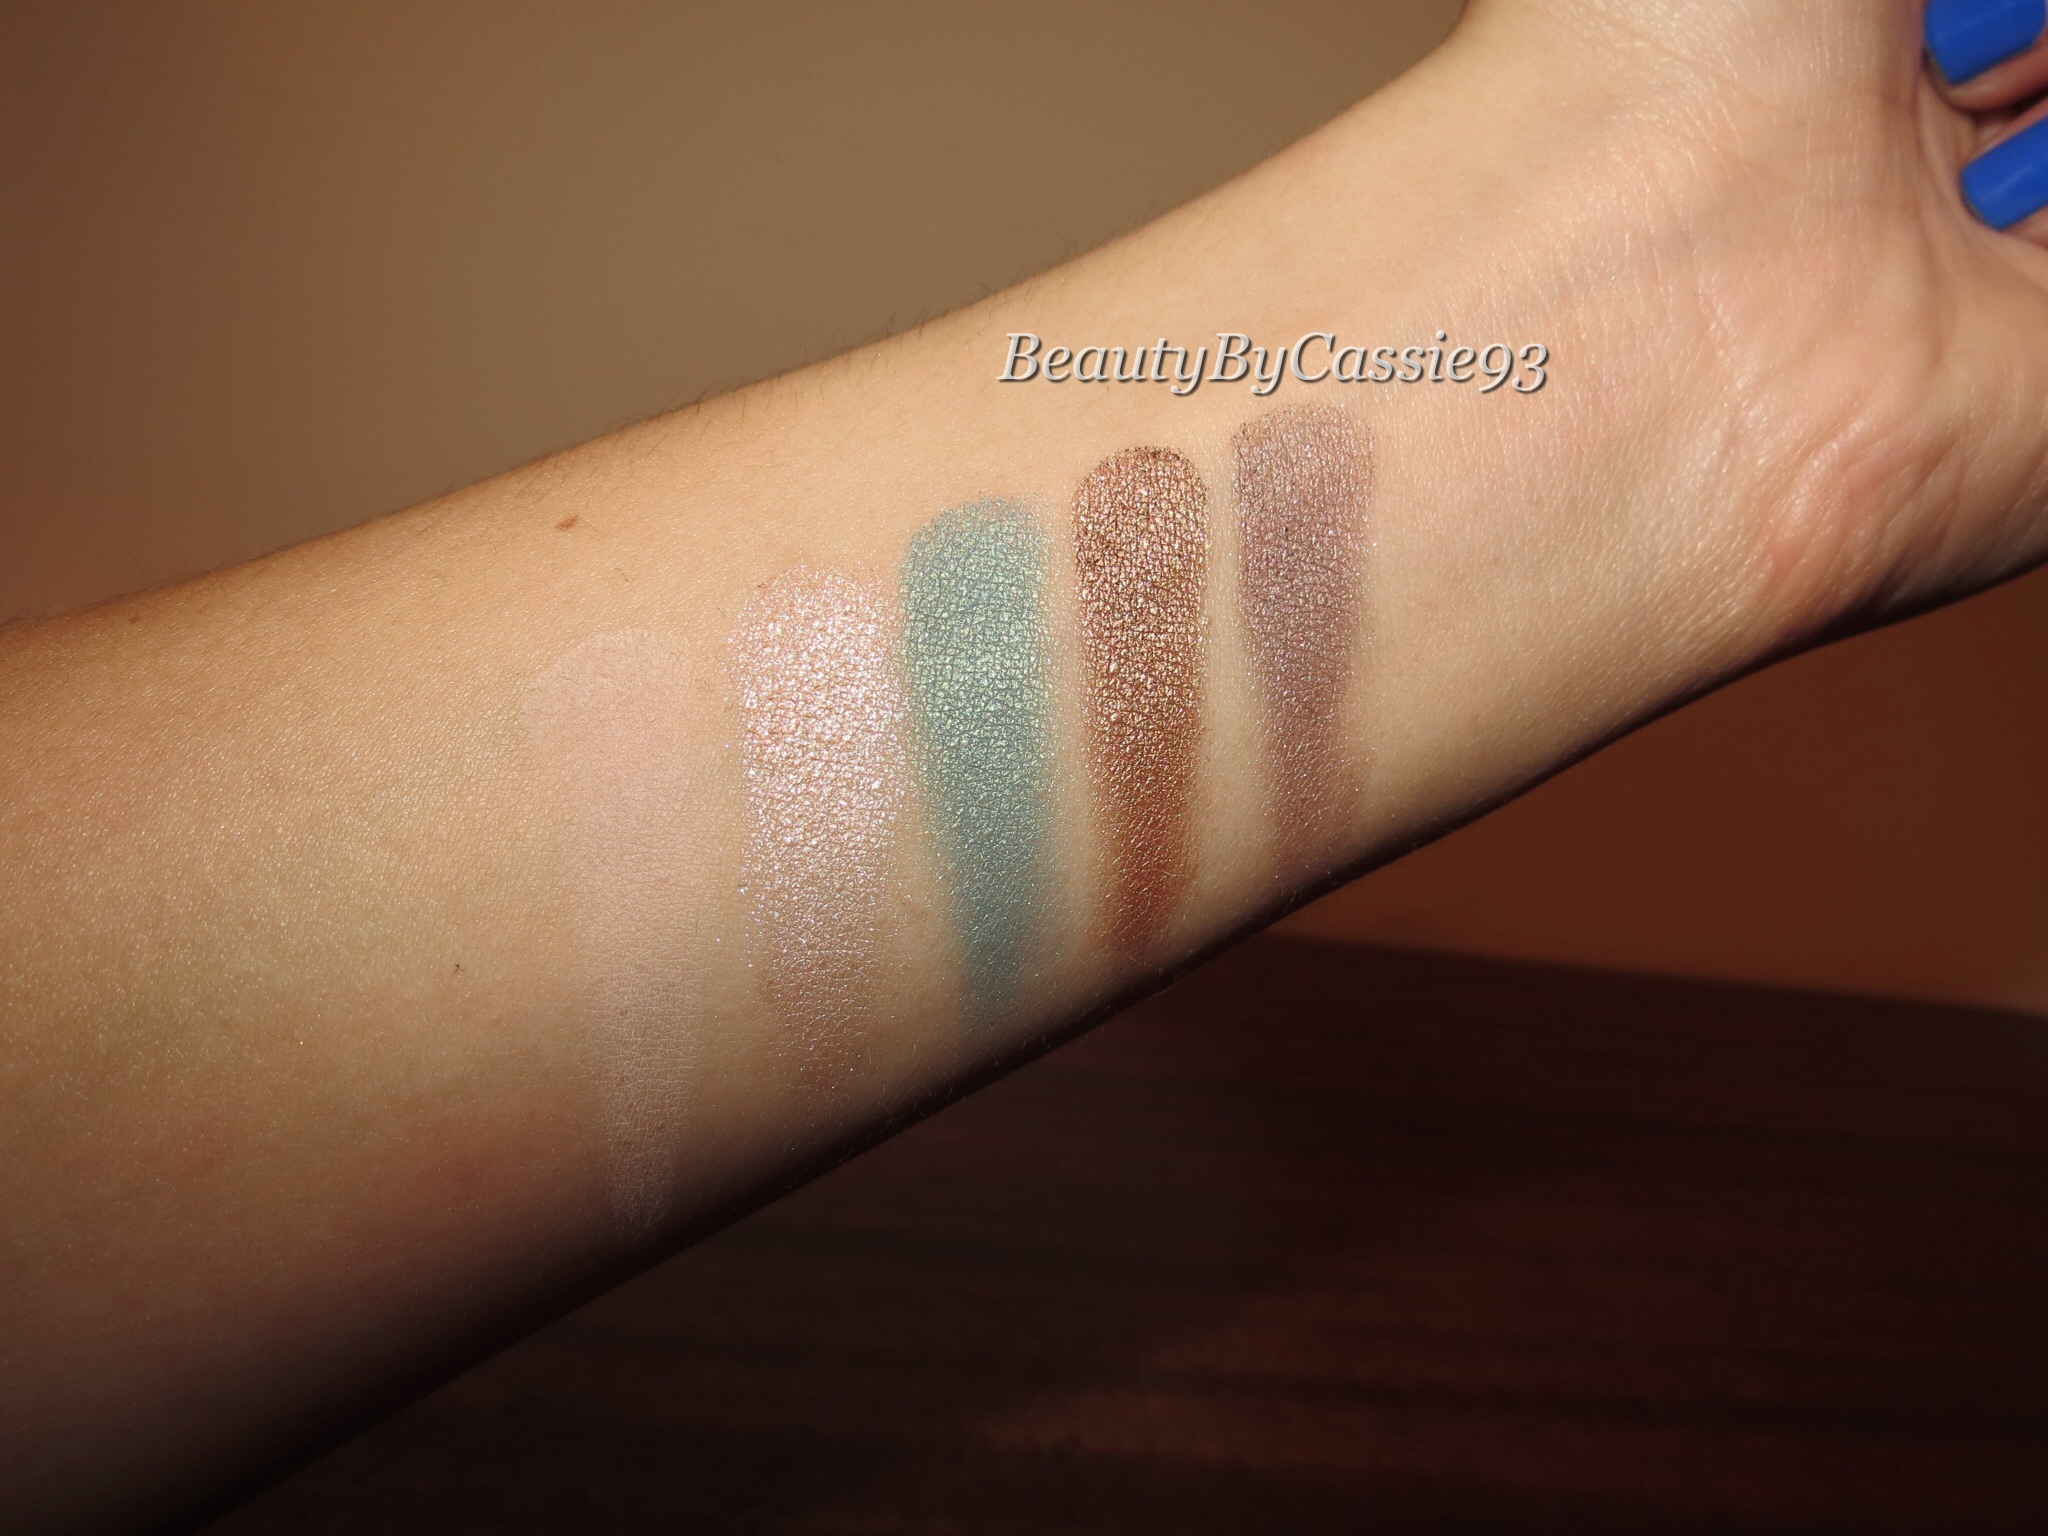
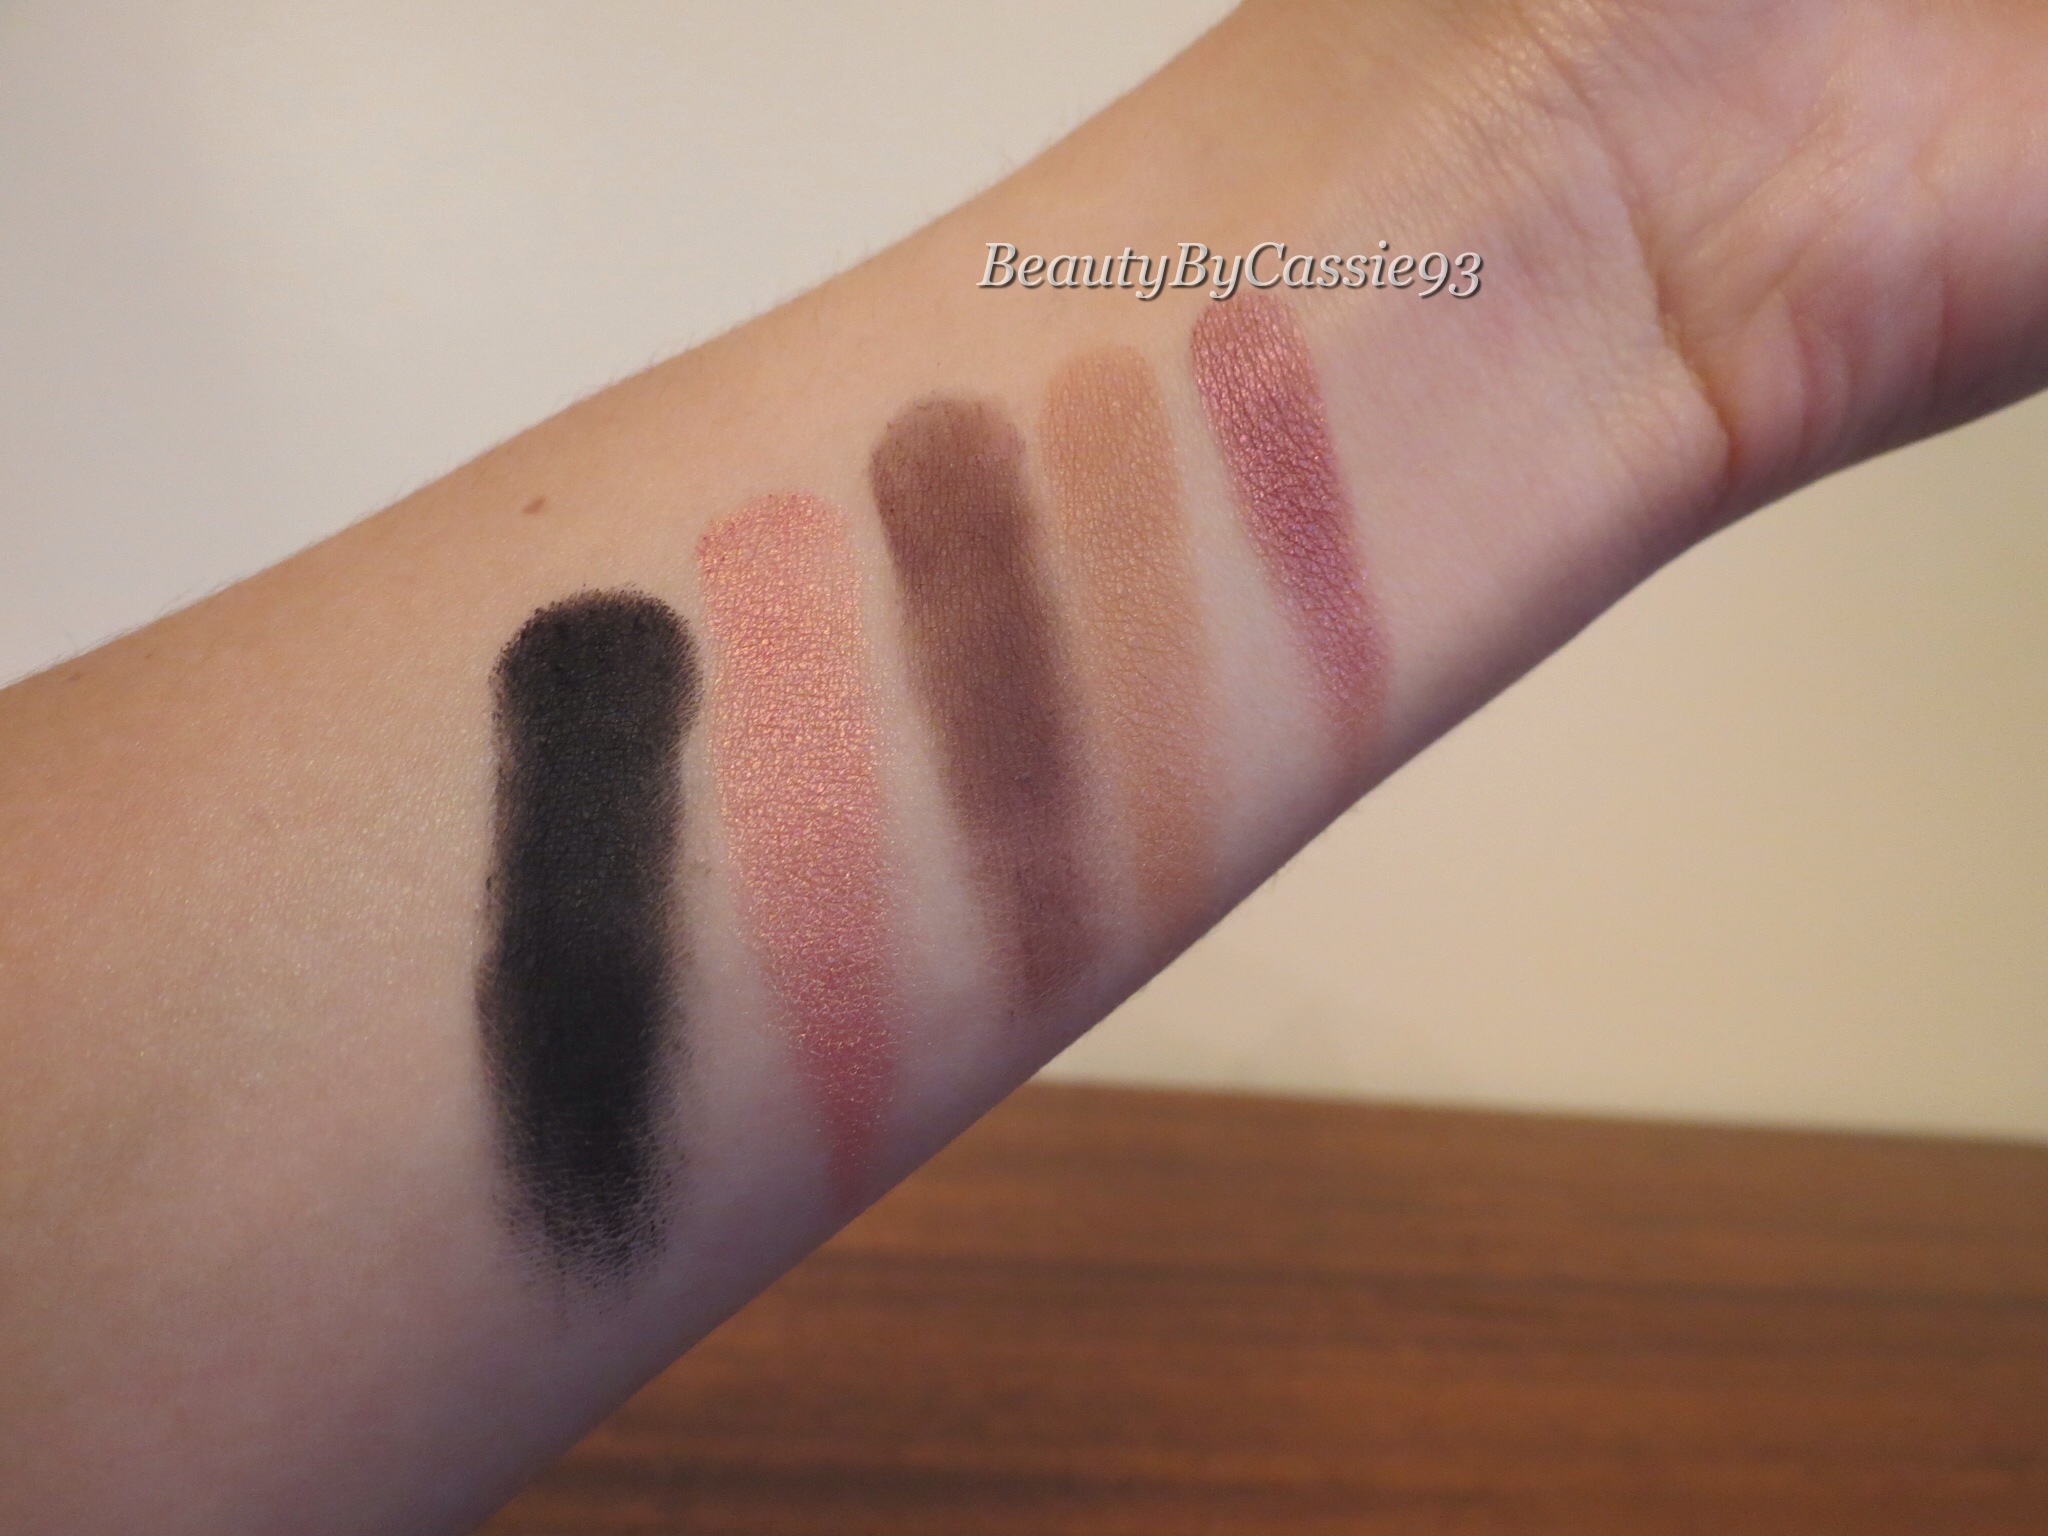
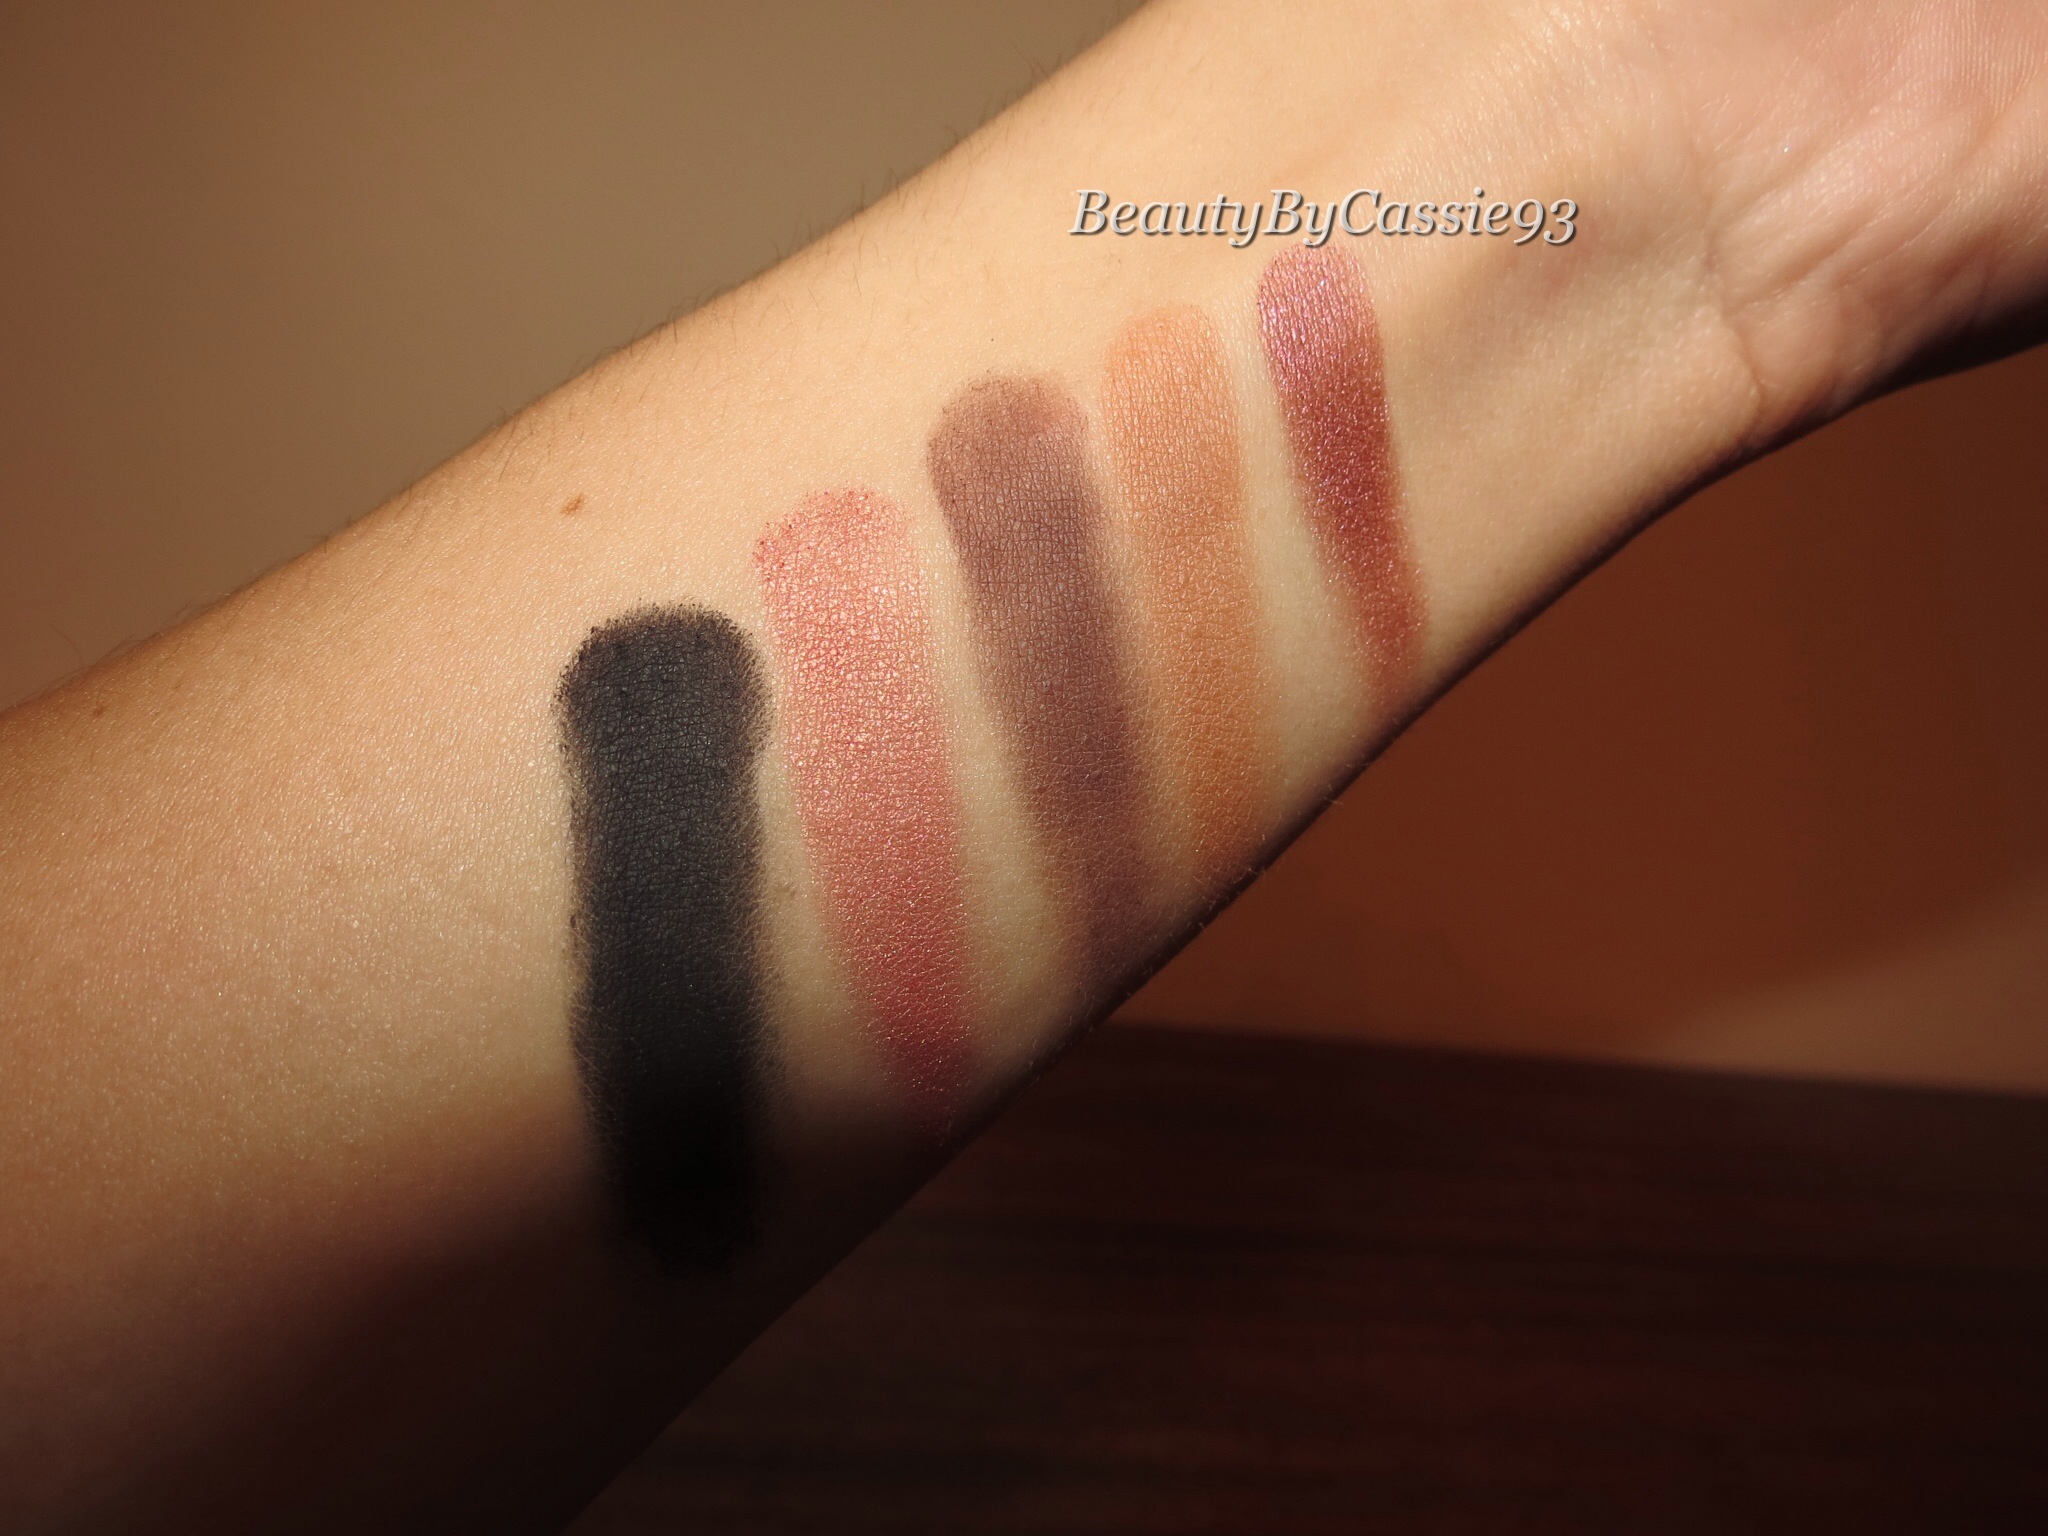
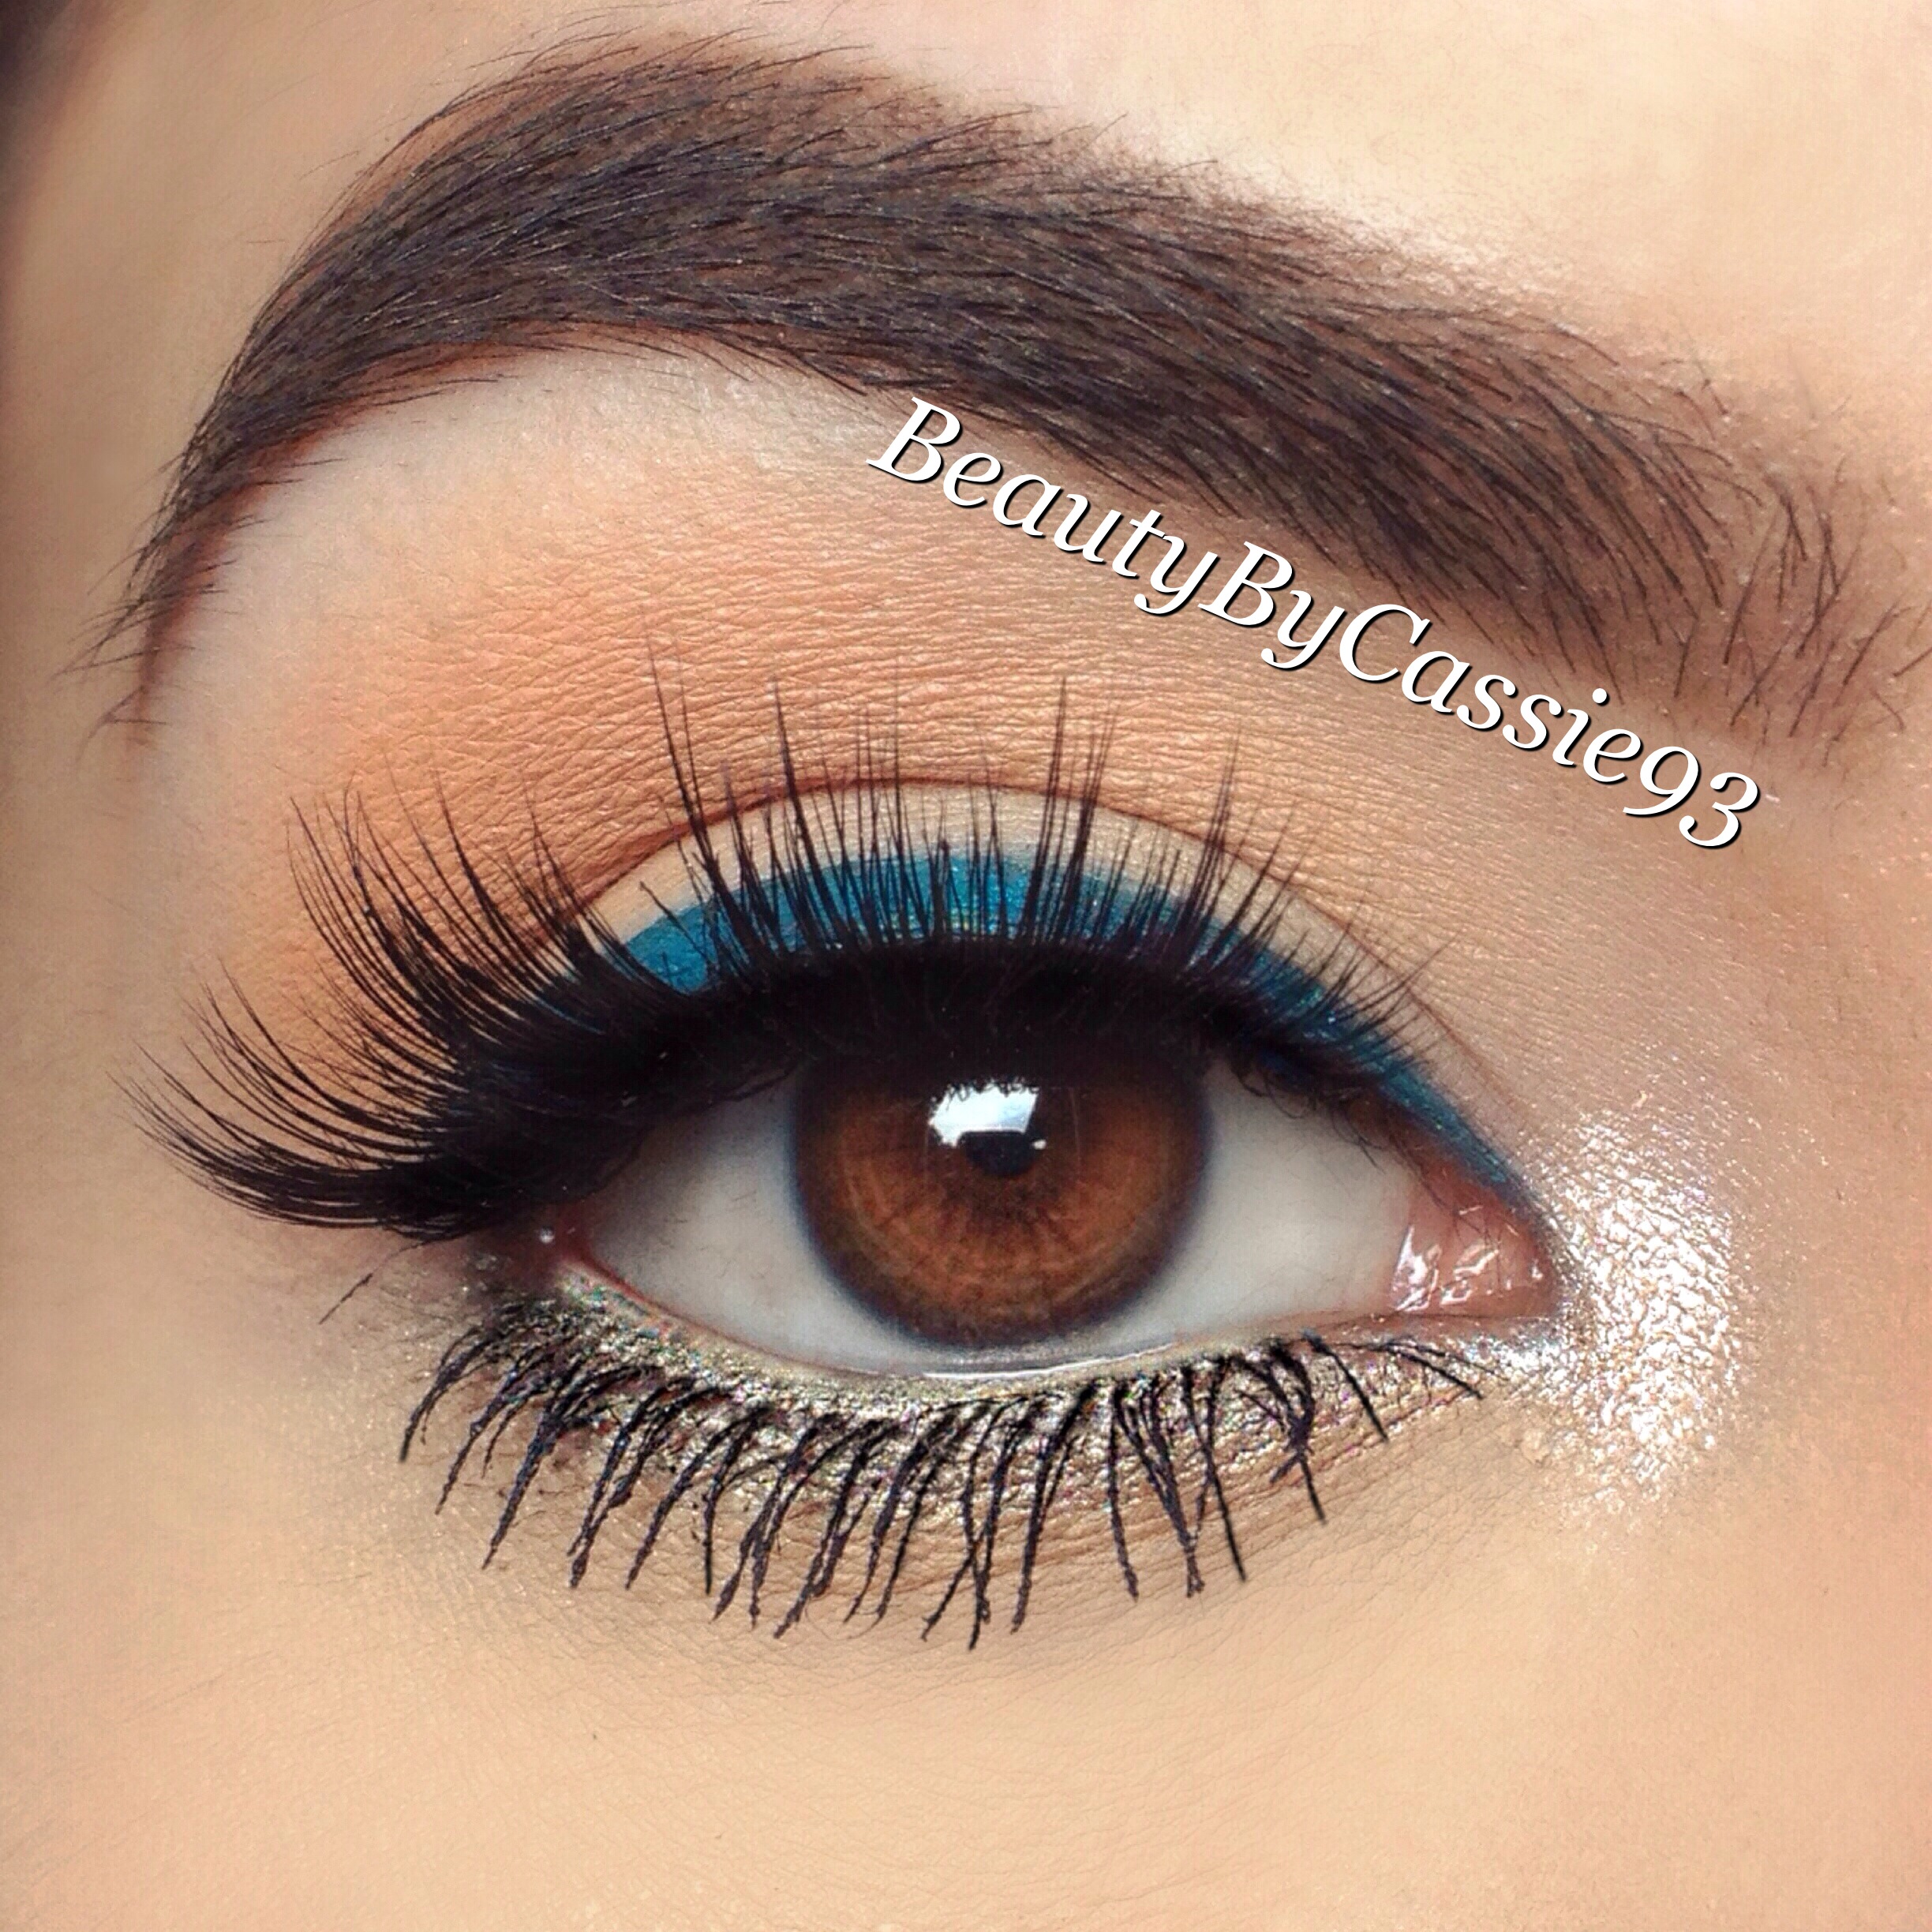
I used Violet Voss glitter in Parker and Piper, Anastasia Beverly Hills Waterproof Crème Color in Jet, ABH Tamanna Palette, Maybelline Color Tattoo in Fuchsia Fever, Iris by Myth Cosmetics, and NYX Jumbo Pencil in Milk.

Lenses: Eye Candy’s lenses in Neo Lucky Clover Green.

Flower halo: Mad for Halos.

Lashes: # 080 from Elegant Lashes.

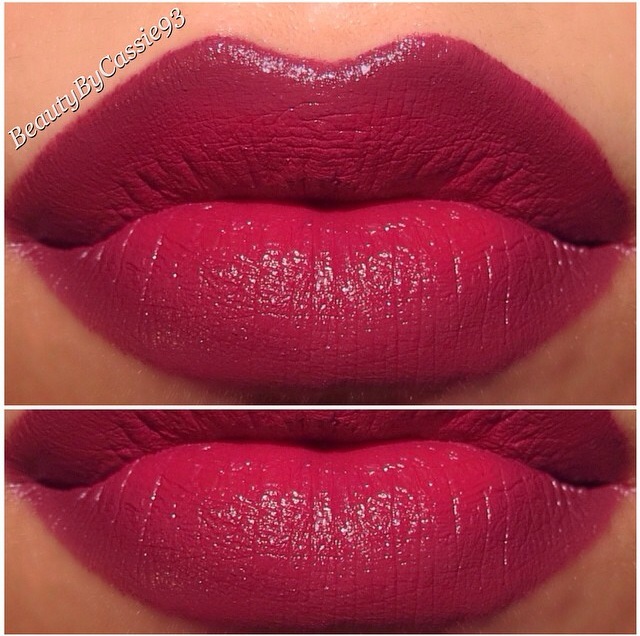
Lipstick: Twilight from @justlovemonae on Instagram.

Brushes used: Luxie Beauty. **Use the code Cassie for 15% off your Luxie Beauty purchase.

Steps to achieve this look:

  1. I first applied a layer of BB cream all over my face.  I used one from Tarte.
  2. Next, I sketched out the eye sockets with Anastasia Beverly Hills Crème Color in Jet and started to shade them in.
  3. After that, I applied Maybelline Color Tatttoo in Fuchsia Fever all over my eye area and blended it into the black.
  4. Next, I applied Iris over the color tattoo and blended Noir from the Tamanna Palette around the outer part of the eye sockets.
  5. Then, I lined my upper lash line with the Crème Color in Jet and lined my lower lash line with Noir.  I also blended Noir into the crease of my eye.
  6. I then applied my lashes and applied Tarte’s Lights, Camera, Lashes Mascara to my lower lashes.
  7. Next, I sketched out my nasal cavity with the Crème Color in Jet and filled it in.
  8. After that, I applied NYX Jumbo Pencil in Milk to my face using a buffing brush and a small precise eye shadow brush for smaller areas like around my nose and between my eyebrows.
  9. Then I drew flower petals around my right eye and applied glitter to the center of each petal.
  10. After, I drew lines along my cheeks extending from the corners of my mouth to my ears blending Noir underneath the line and then adding a touch of Iris as well.
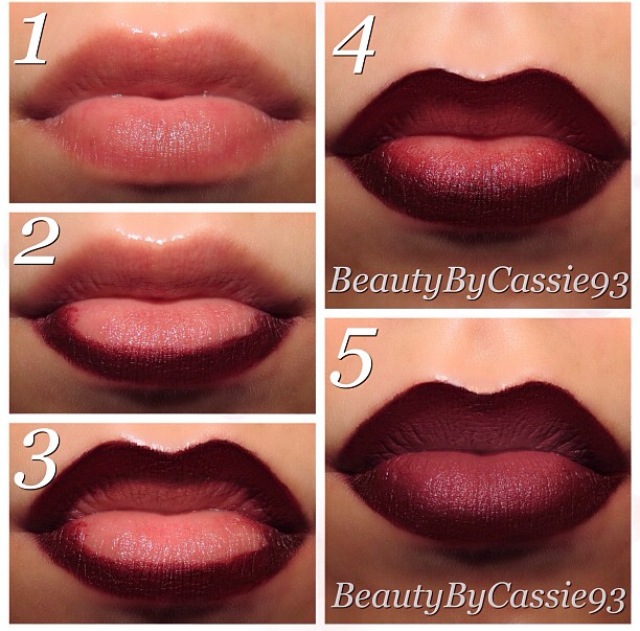
  11. Next, I shaded the center of my lips with the Crème Color in Jet and applied Twilight lipstick to the remaining part of my lips
  12. Then, I drew stitches with the Crème Color in Jet.
  13. Finally, I set the white parts of my face with a white highlighting powder–you can use translucent if that’s all you have.


http://instagram.com/p/utNfzNSndH/?modal=true

Review and Swatches of Whitening Lightning Color Your Smile Lighted Lip Glosses

image

If you watch YouTube beauty videos or follow beauty bloggers on Instagram you may have heard of Whitening Lightning.  It’s a teeth whitening company that also sells beauty products.  I have a number of Whitening Lightning Color Your Smile Lighted Lip Glosses and I must say I really do love them.  They’re lip glosses that incorporate an LED light and a mirror.  At first they sounded quite gimmicky.  But truthfully, the glosses are really opaque and beautiful.  The mirror and LED light also come in handy if you’re out at night.

The Color Your Smile Lighted Lip Glosses are packaged in a rectangular tube which I like because they don’t roll around and fall off flat surfaces.  On one side of the gloss is a mirror, which comes with a sheet of plastic that you have to remove before you can use it.  The mirror isn’t the best quality but it does the job.  You do have to be careful not to scratch it up though.  If you’re like me and carry around a ton of lip glosses and other makeup products I recommend storing your Color Your Smile Lip Gloss in a part of your purse that doesn’t have a million other things that can rub against it and damage the mirror.

image4

When you open the gloss you’ll find an LED light built into the wand.  The LED light turns off after you insert the wand back into the packaging and twist it to close it.  It’s perfect if you’re at a club or party and it’s dark out.  The glosses also have a doe foot applicator, which is my favorite because it applies the product the easiest in my opinion.

image2

image3

I have a total of 16 colors, which I have swatched in indoor light with no flash and then with flash.

image5
From top to bottom: Crystal, Nude, Butter Cream, Sugar Mama, Coral Craze, Pink Tiara, Fiji, and Raspberry Sherbet (No flash)
image8
(With flash)
  • Crystal is a shimmery nude that’s perfect for dabbing in the center of your lips to highlight them and make them appear more plump.
  • Nude is exactly what it sounds like, a gorgeous nude with no shimmer.  I love this gloss alone or topped over a nude lipstick.  It’s even awesome over lipsticks that you want to tone down.
  • Butter Cream is a pink-y nude with no shimmer.  This gloss is also beautiful over nude lipsticks as well as pink ones.
  • Sugar Mama is a very milky pink shade with no shimmer.  It’s not the most flattering shade on me but it’s nice over nude lipsticks.
  • Coral Craze is another one of my favorites.  It’s a milky coral with no shimmer and it’s beautiful alone or paired with a coral lipstick.  I wore this one non-stop this past Summer.
  • Pink Tiara is a light warm pink with no shimmer.
  • Fiji is light cool toned pink with no shimmer.
  • Raspberry Sherbet is a darker cool toned hot pink.  This shade is perfect for bright summer lips.
image7
From top to bottom: Salmon, Pouty Princess, Rose Hill, Summer Sun, Candy Apple, Jewel, Seduction, and Bermuda (No flash)
(With flash)
(With flash)
  • Salmon is a deeper coral than Coral Craze and has no shimmer as well.  This shade is another great one for the summer months.
  • Pouty Princess is a shimmery berry pink shade.
  • Rose Hill is a beautiful rose shade with no shimmer.
  • Summer Sun is a gorgeous bright orange shade without shimmer.
  • Candy Apple is the perfect red with no shimmer.
  • Jewel is a dark berry shade with slight shimmer.
  • Seduction is a super dark borderline black shade without shimmer.  It’s perfect for Fall and Winter.  I would probably use this gloss over a lipstick though just because it can look a little patchy on its own.
  • Bermuda is a pastel purple shade with no shimmer.  It’s not a shade I would probably ever wear in public unless I was going to a Halloween party or something like that.

Overall, I’m really impressed with these glosses.  They aren’t sticky yet they last on the lips.  They also have amazing pigmentation.

**I have a coupon code for anyone interested in purchasing the Color Your Smile Lighted Lip Glosses or any of Whitening Lightning’s other products.  Use the code cassie for 25% off of everything on Whitening Lightning and Gerard Cosmetics.


Review: Anastasia Beverly Hills Tamanna Palette

image

Recently, Anastasia Beverly Hills collaborated with makeup artist Tamanna Roashan(@dressyourface on Instagram) and launched the Tamanna Palette.  The palette includes 10 pigmented eyeshadows that are especially perfect for the upcoming Holiday season.  The Tamanna Palette retails for $29.  Anastasia Beverly Hills also launched the Waterproof Crème Color in Azure and the Metallic Luster Liner each retailing for $18.

image9 image8

image7

For the past few weeks of owning the Tamanna Palette, I have created numerous looks ranging from dramatic to simple.  The palette contains a few matte shadows as well as shimmer and satin finishes.  I really enjoy this palette and think it contains some beautiful shadows.  It also comes with a double ended eyeshadow brush.  It’s the standard double ended brush that Anastasia always includes with her eye palettes.  It has a pointed pencil brush on one end and a flat shader brush on the other.

From left to right: Fresh, Blush, Venezia, Gilded, and Custom (Without flash)
(With flash)
(With flash)

Top row:

  • Fresh: It’s a light nude shadow that blends in with my skin tone. It’s a perfect shadow for an all over lid color or even a subtle highlight.
  • Blush: It’s a pink toned shimmery champagne shadow.  I absolutely love this shade for highlighting my tear duct.
  • Venezia: It’s a beautiful shimmery teal/blue shadow that would be perfect as a pop of color along the lower lash line.
  • Gilded:  It’s a gorgeous shimmery bronze shadow.  This shadow is extremely similar in color to Maybelline’s Color Tattoo in Bad to the Bronze.
  • Custom:  It’s a beautiful shimmery taupe shadow.
image15
From left to right: Noir, China Rose, Chocolate, Bengal, and Sangria. (Without flash)
image14
(With flash)

Bottom row:

  • Noir: It’s an extremely pigmented matte black shadow.  This is a great shadow to line your eyes with if you don’t feel like using a traditional eyeliner and want a softer looking line.
  • China Rose:  It’s a beautiful rose gold shade.  This is probably my favorite shadow in the entire palette.
  • Chocolate:  It’s a lovely warm matte brown shadow.  I love this one for adding depth to my eyeshadow looks.
  • Bengal: It’s a nice medium brown with a satin finish.  This is a great transition shade.
  • Sangria:  It’s a pretty shimmery purple/wine shadow.  This color is amazing for making brown, green, or hazel eyes pop.

Overall, I’m not disappointed with any of the shadows in this palette.  The pigmentation is wonderful and I think the Tamanna Palette is definitely worth $29.

I’ve created a smokey rose gold look using the palette.  For all of the details on this look, check out my Instagram account.

photo 1

photo 2

image2
Waterproof Crème Color in Azure. (Taken with flash)

image4

The Waterproof Crème Color in Azure is a cream product that can be used as a cream shadow or an eyeliner.  It’s smudge proof and crease proof and is a gorgeous blue color.

Waterproof Crème Color in Azure. (Without flash)

The last product, Anastasia Beverly Hills Metallic Luster Liner in Liquid Gold is a super soft pencil that glides on effortlessly.  It’s a pretty metallic gold color and I love using it on my waterline to brighten up my eyes and make myself look wide awake.

image5
Metallic Luster in Liquid Gold. (With flash)
image6
(Without flash)

My Current Skincare Routine

IMG_7262

Skincare is extremely important to me.  Maintaining a good skincare regimen is imperative especially if you wear makeup.  When your skin is at it’s best your makeup applies easier and looks better.

Steps to my skincare routine:

1. Cleanse:  I use SheaMoisture African Black Soap.  It’s an organic black solid soap that lathers extremely well and even removes makeup.  It doesn’t leave my skin feeling dry and lacking moisture.  It retails for around $5 so it’s an absolute steal considering how long it lasts.  I started using it in April and I’m still using the same bar of soap.  I use the soap with my Vitagoods Spin for Perfect Skin brush– use the code BeautyC33 for a 70% discount.

IMG_7265

2. Tone:  I use Witch Hazel as a toner.  Toner is essential because it restores your skin’s ph balance and removes any traces of makeup that were left behind.

IMG_7266

3. Moisturize:  I use Josie Maran Argan Oil Light.  It’s a beauty oil that really moisturizes my skin and it only takes two or three drops for my entire face.  Additionally, if I’m going out to be out in the sun, I use Equate Complete Beauty Lotion SPF 15 over top.

IMG_7267

IMG_7269

Additional steps:

  • A few times a week I’ll use masks and do chemical peels.
  • About every other day I do a chemical peel.  I use Peter Thomas Roth Unwrinkle Peel Pads.  They are great at removing the top layer of skin and helping improve the texture.  They also help fade and scars or post acne marks.

IMG_7268

IMG_7270

IMG_7272

  • I alternate between the Cucumber Gel Mask and Rose Stem Cell Bio-Repair Gel Mask whenever I feel like I need to refresh my skin or I have any blemishes.  They really help sooth your skin and provide a nice cooling effect.  I feel like the masks also help clear up blemishes.
  • The Pumpkin Enzyme Mask is technically a mask.  However, it’s more like a chemical peel in my opinion because it provides a slight burning sensation and exfoliates your skin extremely well.  I usually only use this mask once a week since it’s so intense.

Review: Loving Tan Bronzing Mousse in Medium

Personally, I love a good tan.  It makes you look healthier and slimmer.  However, I’m not a fan of tanning beds or laying out in the sun since it’s so harmful to your skin and your health.  A great alternative to achieving a nice tan is using self-tanning products.  I recently tried Loving Tan Deluxe Bronzing Mousse in Medium and it’s a great product.  Loving Tan Deluxe Bronzing Mousse is available in three shades, Medium, Dark, and Ultra Dark.  As with all products it has pros and cons.

Pros:

  • Loving Tan Deluxe Bronzing Mousse has a nice scent.  Oftentimes self-tanning products have an unpleasant smell but this one is nice.
  • It provides a natural-looking tan.  Some self-tanning products give you an orange look, but this one provides a natural looking olive color because it contains DHA and Erythrulose.
  • It’s long lasting.  I applied this on Saturday and it has lasted five days so far.  Supposedly it will last up to 10 days if you keep your skin moisturized.
  • It dries fairly quickly after application.
  • It’s Organic and contains natural ingredients.  It’s also free of parabens and alcohol.
  • It contains an instant bronzer that gives an instant color boost and acts as a fool proof color guide to show where the product has been applied.

Cons:

  • It doesn’t come with a mitt. (**However, use the code beautybycassie and receive a free mitt with your purchase)
  • You have to move pretty quickly when applying the product because it dries fairly fast and can leave streaks if you’re not careful.
  • It can feel a bit tacky after application but it goes away within a few minutes.
  • You have to avoid water or perspiration for six hours after application so the tan can develop.
  • To maintain the tan you have to avoid swimming pools.
Left: Before application. Right: After 6 hours of development time. Pictures taken in outdoor sunlight.

As you can see Loving Tan Deluxe Bronzing Mousse gave me a natural looking bronzed look.

Overall, I do enjoy this product.  It’s not my favorite self-tanner just because you have to work quickly during application and I’ve gotten better results with Tarte’s Brazilliance™ skin rejuvenating maracuja face and body self tanner but it does a nice job nonetheless.

Tutorial: Creating an Ombre Lip

Ombre lips are very trendy especially for Fall.  I often get questions about how to achieve this look and it’s honestly not that complicated.  Below I’ve inserted a pictorial and listed the steps.

photo (1)

  1. First, you should exfoliate your lips to remove any dead skin.  You can either use a lip scrub or a soft-bristled tooth brush.  This will also make your lips appear more plump because, as stated in an online article, you will increase the blood circulation to your lips.
  2. Next, you’re going to want to outline your bottom lip with your lipstick.  You may even want to use a lip liner if you’re using a dark colored lipstick just because that can help prevent the lipstick from feathering and bleeding outside your lip line.
  3. After that, go ahead and outline your upper lip with your lipstick.
  4. Next, use either a lip brush or your finger to blend the lipstick into the center of your lips.
  5. Finally, apply a lighter colored lipstick to the center of your lips to create contrast.

This dark, vampy lip combo is absolutely perfect for Fall and Winter.  Pair these lips with a simple neutral cat eye and you’ll be good to go.

This ombre technique is useful in making your lips appear fuller.

Remember, there are no rules when it comes to makeup so get creative with your ombre lips! You can apply a lighter color around the outside of your lips and a darker shade in the center.  You can even start with either a lighter shade or darker shade on one corner of your mouth and have it fade to dark or light.

Here are a few other ombre lip looks I’ve done in the past:

Red Velvie and Plumberry Pie lipsticks from Beauty Bakerie
photo 3 (1)
Honey and Marshmallow lipsticks from Beauty Bakerie
photo 2 (1)
Divine Dime Cosmetics lipstick in Bell, Feyoshe Cosmetics lipstick in Nude Beach, and Tarte Cosmetics LipSurgence in Thoughtful


Five Ways to Appear Bright Eyed and Wide Awake when You’re Tired

We’ve all had those days when we’re exhausted but don’t want to look like we’ve been up all night.  Whether you’ve had a late night studying or were out partying with friends, you can fool everyone with these tips:

  1. One thing you can do is make sure you use a highlighting concealer under your eyes to brighten up the under eyes and conceal any dark circles you may have.
  2. Another way to appear more awake is to curl your eyelashes and apply some mascara to your upper and lower lashes.  Curling your lashes opens up the eye.  You can even take it a step further and apply some false lashes which will make your eyes appear larger and more awake.
  3. Also, you can line your waterline with a cream colored pencil or a shimmery champagne colored one.  You’d probably want to avoid black liner on the waterline just because it can tend to close up the eyes and make them appear smaller.
  4. Another tip is to add a shimmery eyeshadow to the inner corners of your eyes.  This highlights the area and brings light into your eyes.
  5. You can also line your upper lash line.  This will make your eyes appear larger.

In the picture below I’ve utilized the tips I’ve mentioned.  As you can see I appear wide awake and bright eyed.

photo (2)

Complete product details:

Simple eye look with a pop of teal using Anastasia Beverly Hills contour powders in Vanilla and Nude, ABH Metallic Luster Liner in Liquid Gold, ABH Waterproof Creme Color in Azure, Cultureshock Cosmetics eyeshadow in Emerald, Hair and Makeup Addiction brushes, are Tarte Cosmetics Amazonian Clay Waterproof Brow Mousse in Taupe, their Amazonian Clay tinted brow gel in Taupe, and Luna @lapetitlapinlashes.
Product info:
1.) Prime your lid(I used Urban Decay Anti-aging Primer Potion).
2.) Apply Vanilla all over your lid.
3.) Blend Nude into your crease.
4.) Line your upper lash line with Azure.
5.) Apply Emerald over top of Azure.
6.) Line your lower lash line and waterline with Liquid Gold.
7.) Apply @lapetitlapinlashes in Luna, @tartecosmetics Lights, Camera, Lashes mascara to your lower lashes, and highlight your tear duct with a champagne shadow.
On my brows I used @tartecosmetics Amazonian Clay Waterproof Brow Mousse in Taupe and their tinted brow gel in Taupe.

Here’s the complete look:

photo (1)

The flower halo is from Mad For Halos.


Review of Bella’s Boutique Jewelry

Over the past few months I’ve received a few pieces of jewelry from Bella’s Boutique.  Every piece has been well made and great quality.  Of all of the pieces I have, I haven’t had a single one break or have any stones fall out.  I actually dropped a crystal encrusted pair of earrings on a tile floor and was impressed that none of them fell out.  Bella’s Boutique carries everything from statement necklaces, bracelets, and earrings to watches.  Most of the jewelry on the site is quite flashy, which I enjoy.  I definitely recommend purchasing from the site because, in my opinion, everything is very reasonably priced and many pieces come in sets.

I have a few pairs of earrings from Bella’s Boutique.  Each pair is extremely bold and beautiful.

photo 1

photo 2

The above dangle earrings retail for $7, which is an absolute steal in my opinion, considering a similar pair from a department store would probably be double or triple in price.

photo 3

The gold and teal diamond shaped dangle earrings I’m wearing above are one of my favorite pairs.  They also retail for $7.  They are somewhat heavy but that’s to be expected for a pair of earrings that large.  To be honest, after the first few minutes of wearing them I forget I even have them on.

photo 5

The above necklace is absolutely stunning.  It’s definitely a statement piece.  I actually created a gold and teal eyeshadow look inspired by the necklace.  For a list of products used, check out my Instagram account.


photo

photo 4

The above asymmetrical pearl statement necklace is very classy and on trend for the season.  It retails for $14.95.

How to: Smokey Look Using the New Anastasia Beverly Hills Maya Mia Palette and Tamanna Palette

Recently I’ve received Anastasia Beverly Hills’ new beauty blogger palettes–the Maya Mia Palette and Tamanna Palette–and have been playing around with a bunch of different looks ranging from simple everyday looks to full on dramatic ones.  I’m really impressed with the quality of the shadows in each palette.  They’re super pigmented and easy to blend.

Here is a look I created using both of the palettes.  It’s perfect for going out at night.  It’s an almost all matte look with some shimmer in the inner corners of the eyes.

photoTUBAKSZP

photo46OOOEIS

I used the @anastasiabeverlyhills Maya Mia and Tamanna Palettes, ABH Waterproof Crème Color in Jet, # 415 Black lashes by @elegantlashes, @anastasiabeverlyhills Dipbrow in Dark Brown, and @hairandmakeupaddiction brushes.

Product info:
1.) Prime your lid(I used Urban Decay Anti-aging Primer Potion).
2.) Apply Fresh all over your lid with a flat shader brush.
3.) Blend Caramel into your crease using a fluffy blending brush.
4.) Deepen your crease with Deep Brown using a crease brush.
5.) Line your upper lash line with the Waterproof Crème Color in Jet and smudge Noir over top.
6.) Line your lower lash line with Noir and blend out with Caramel.
7.) Line your waterline with Tarte Cosmetics Skinny SmolderEYES in Onyx.
8.) Apply @tartecosmetics Lights, Camera, Lashes mascara, # 415 @elegantlashes, and highlight your tear duct with Blush.
On my brows, I used @anastasiabeverlyhills Dipbrow in Dark Brown.
**Use the code BeautyByCassie93 at checkout on your Elegant Lashes order and receive a free pair of # 415 Black lashes.